【爱克斯开发板试用】将yolov5部署到爱克斯板
 openlab_7d6852b3
更新于 2年前
openlab_7d6852b3
更新于 2年前
一、训练自定义模型
在训练的服务器上面下载yolov5
git clone https://github.com/ultralytics/yolov5
然后安装yolov5的依赖
cd yolov5 && pip install -r requirements.txt
然后在yolov5/data编写自己的训练数据集的yaml,训练自定义的模型
python train.py --data myData.yaml --epochs 300 --weights ./weights/yolov5s.pt --cfg yolov5s.yaml --batch-size 8
训练完成后,在 runs/train/expN/weights文件夹中的文件夹可以得到best.pt
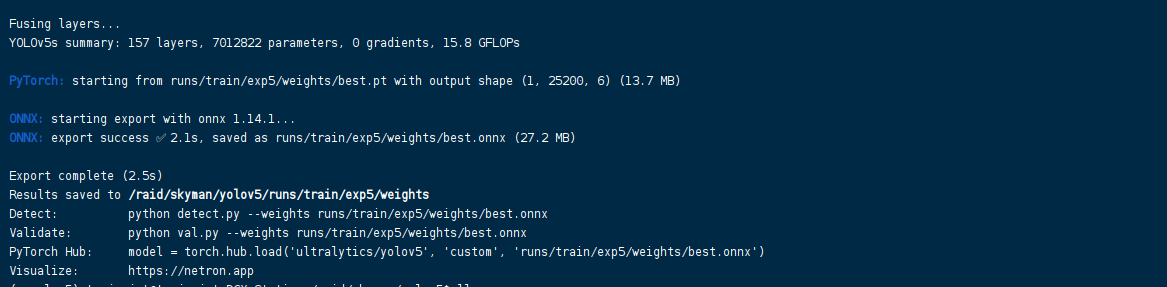
二、转换ONNX
yolov5s需要指定opset为11,否则会报错。
python export.py --weights path/best.pt --batch-size 1 --include onnx --opset 11
三、爱克斯开发板安装openvino
pip install openvino-dev[ONNX,pytorch,tensorflow2]==2023.1.0

四、ONNX转换为IR指令
将对应的best.onnx**,上传到爱克斯开发板上,然后使用下列指令进行转换
mo --input_model best.onnx --compress_to_fp16 --input_shape [1,3,640,640]
转换成功后,当前文件夹下会出现best.xml和best.bin两个文件。
五、推理
import openvino.runtime as ov
import numpy as np
import cv2
import time

#加载模型
core = ov.Core()
model = "best.xml"
weight******est.bin"
model_ir = core.read_model(model= model,weights=weights)
com_model_ir= core.compile_model(model=model_ir,device_name="GPU")
output_layer_ir = com_model_ir.outputs[0]

#图片处理
input_h, input_w, input_c, input_n = (640, 640, 3, 1)
input_image = cv2.imread("0.jpg")
input_image = cv2.resize(input_image, (input_w, input_h))
input_image = cv2.cvtColor(input_image, cv2.COLOR_BGR2RGB)
input_image = input_image / 255
input_image = input_image.transpose((2, 0, 1))
images = np.ndarray(shape=(input_n, input_c, input_h, input_w))
images[0] = input_image

#推理
res_ir = com_model_ir(images)[output_layer_ir]
Confidence_Level = 1/(1+np.exp(-res_ir[0]))
result_mask_ir = np.squeeze(np.argsort(res_ir, axis=1)).astype(np.uint8)
至此,yolov5已经成功在爱克斯板上运行。
0个评论