哪吒开发板试用&结合oak深度相机进行评测
 openlab_96bf3613
更新于 1年前
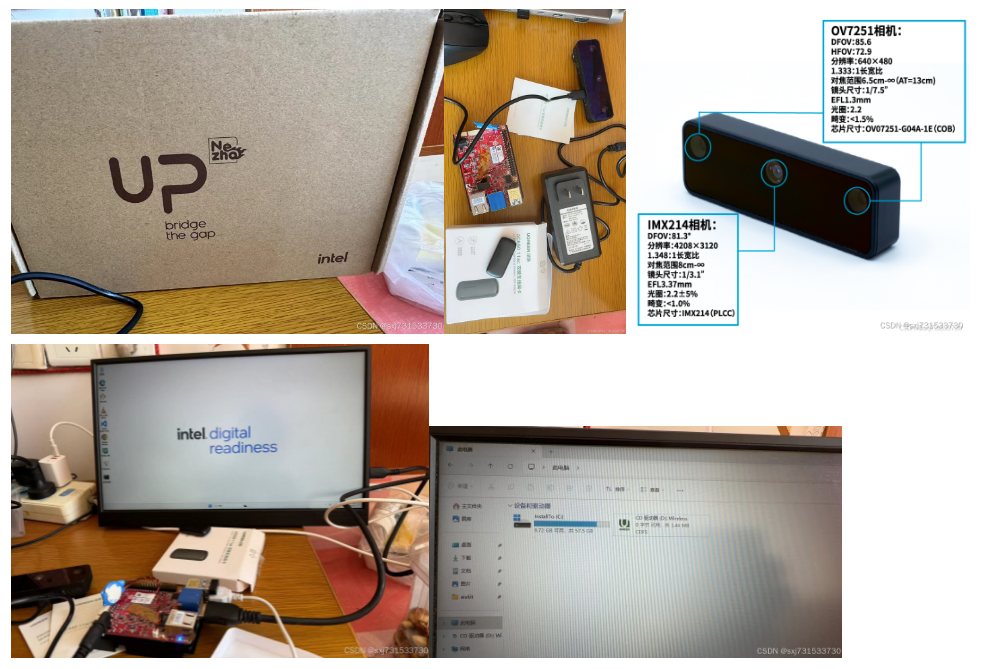
基本思想:收到intel的开发板-小挪吒,正好手中也有oak相机,反正都是openvino一套玩意,进行评测一下,竟然默认是个window系统,刷机成llinux系统比较方便
一、 我们先刷个刷成linux系统,测试比较方便,虽然window+python代码也可以开发,搞点难度的ubuntu+&++推理,同时还为了测试灰仔的ncnn,勉为其难,把系统刷掉,系统我们选择intel适配的22.04即可,确保和cpu的型号相同即可:
Thank you for downloading Ubuntu Desktop | Ubuntu
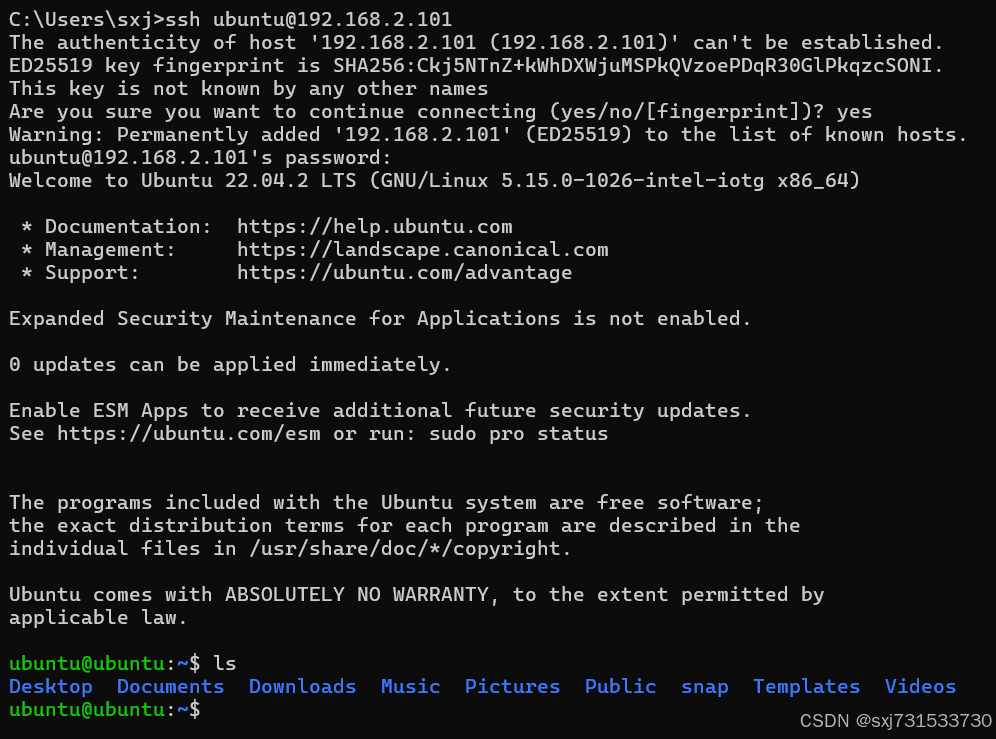
使用motrix的*****较快,然后使用rufus进行刻录优盘进行sd卡刻入,系统变成linux,就可以远程设置一下ssh;系统界面如上;系统需要安装官方的openvino组件,使用intel端进行openvino模型推理,当然也可使用ncnn/mnn/onnx都可以,但是还是用原声组件更有好一些
二、先配置oak的环境,适配深度相机推理和测距,然后在开发板上推理关键点检测推理,演绎一下测试开发版性能,正好相机端的芯片也是intel使用openvino框架,下面操作是开发板上配置一下相机使用的库环境
ubuntu@ubuntu:~$ wget https://gitee.com/oakchina/depthai-core/releases/download/v2.28.0/depthai_2.28.0_amd64.deb
ubuntu@ubuntu:~$ sudo apt install -f
ubuntu@ubuntu:~$ sudo dpkg -i depthai_2.28.0_amd64.deb
(Reading database ... 164136 files and directories currently installed.)
Preparing to unpack depthai_2.28.0_amd64.deb ...
Unpacking depthai (2.28.0) over (2.28.0) ...
Setting up depthai (2.28.0) ...
配置一下OpenVINO ,参考 手册,这个主要后面写代码和转模型用,但是我用c++写代码,搞点难度的事情
https://www.intel.com/content/www/us/en/developer/tools/openvino-toolkit/download.html?PACKAGE=OPENVINO_BASE&VERSION=v_2022_3_2&ENVIRONMENT=DEV_TOOLS&OP_SYSTEM=LINUX&DISTRIBUTION=PIP
链接,下面操作仍然在开发板上执行
pip install openvino-dev==2022.3.2
storage.openvinotoolkit.org

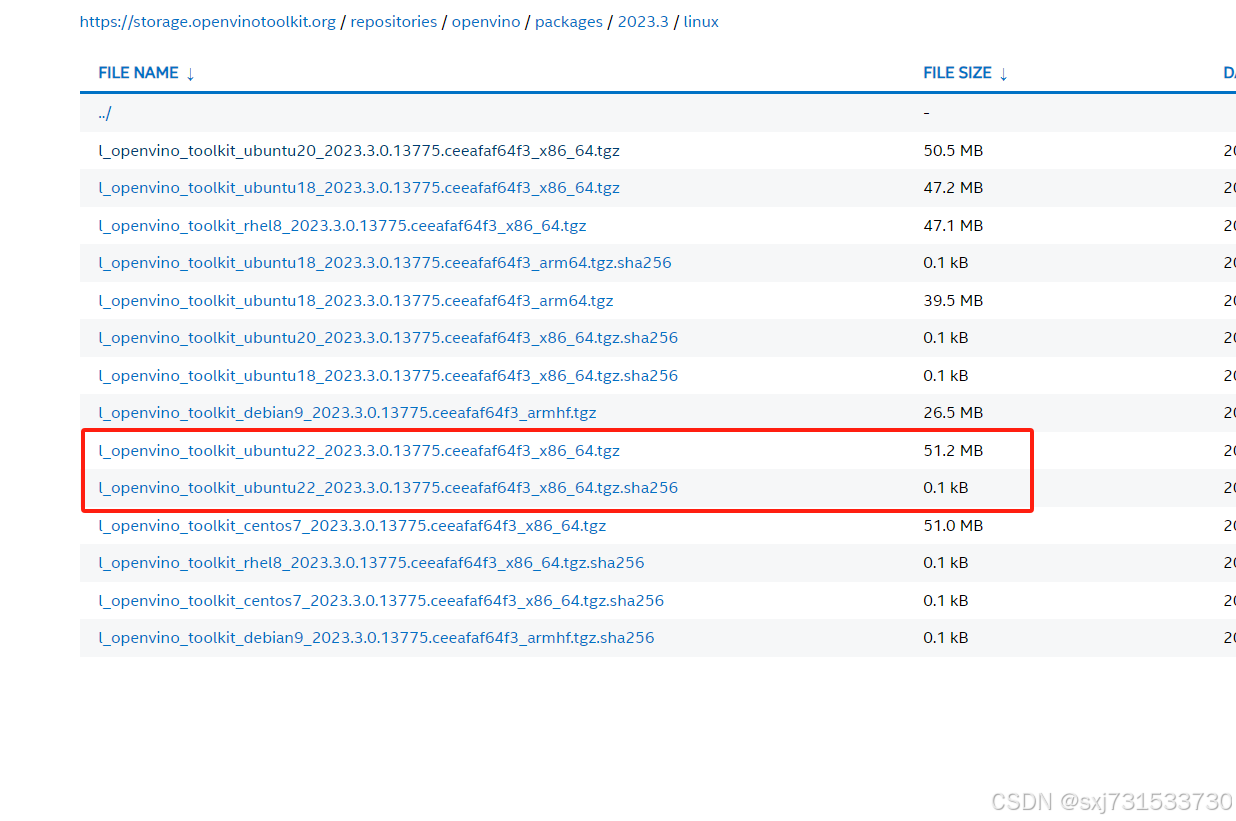
ubuntu@ubuntu:~$ wget https://storage.openvinotoolkit.org/repositories/openvino/packages/2023.3/linux/l_openvino_toolkit_ubuntu22_2023.3.0.13775.ceeafaf64f3_x86_64.tgz
ubuntu@ubuntu:~$ sudo tar xf l_openvino_toolkit_ubuntu22_2023.0.0.10926.b4452d56304_x86_64.tgz.tgz.sha256.tgz -C /opt/intel/
ubuntu@ubuntu:~$ tar -zxvf l_openvino_toolkit_ubuntu22_2023.3.0.13775.ceeafaf64f3_x86_64.tgz
ubuntu@ubuntu:~$ mv l_openvino_toolkit_ubuntu22_2023.3.0.13775.ceeafaf64f3_x86_64 openvino_2023
ubuntu@ubuntu:~$ mv openvino_2023/ /opt/intel/
ubuntu@ubuntu:~$ cd /opt/intel/
ubuntu@ubuntu:~$ cd openvino_2023/
ubuntu@ubuntu:/opt/intel/openvino_2023$ vim ~/.bashrc
source /opt/intel/openvino_2023/setupvars.sh
ubuntu@ubuntu:~$ cd /opt/intel/openvino_2023/install_dependencie****r/>ubuntu@ubuntu:/opt/intel/openvino_2023/install_dependencies$ sudo -E ./install_openvino_dependencies.sh
下面操作在自己的宿主机器上执行,主要发现在开发板上的openvnino无法转相机的blob模型,但是这个低版本的openvino库又无法开发板,应为2021.4支持系统ubuntu20.04版本和一下,开发板的版本是22.04系统版本过高
三、先搞一下yolov5lite,这个官方给了方法和例子,简要叙述和附上,这个我是在自己的宿主主机上做的ubuntu20.04 因为现在开发板版本过高,我担心它的openvino环境转的blob不一定能在oak相机上运行
ubuntu@ubuntu:~/Downloads$ axel -n 100 https://registrationcenter-download.intel.com/akdlm/IRC_NAS/18096/l_openvino_toolkit_p_2021.4.689.tgz
ubuntu@ubuntu:~$ tar -zxvf l_openvino_toolkit_p_2021.4.689.tgz
ubuntu@ubuntu:~/Downloads$ cd l_openvino_toolkit_p_2021.4.689/
ubuntu@ubuntu:~/Downloads/l_openvino_toolkit_p_2021.4.689$ sudo ./install_GUI.sh
ubuntu@ubuntu:~$ cd /opt/intel/openvino_2021/install_dependencie****r/>ubuntu@ubuntu:/opt/intel/openvino_2021/install_dependencies$ sudo -E ./install_openvino_dependencies.sh
ubuntu@ubuntu:/opt/intel/openvino_2021/bin$ sudo vim ~/.bashrc
在末尾添加
source /opt/intel/openvino_2021/bin/setupvars.sh
ubuntu@ubuntu:/opt/intel/openvino_2021/bin$ source ~/.bashrc
[setupvars.sh] OpenVINO environment initialized
ubuntu@ubuntu:/opt/intel/openvino_2021/bin$ cd /opt//intel/openvino_2021/deployment_tool***odel_optimizer//install_prerequisite****r/>ubuntu@ubuntu:/opt/intel/openvino_2021/deployment_tool***odel_optimizer/install_prerequisites$ sudo ./install_prerequisites.sh
下载模型,进行转模型
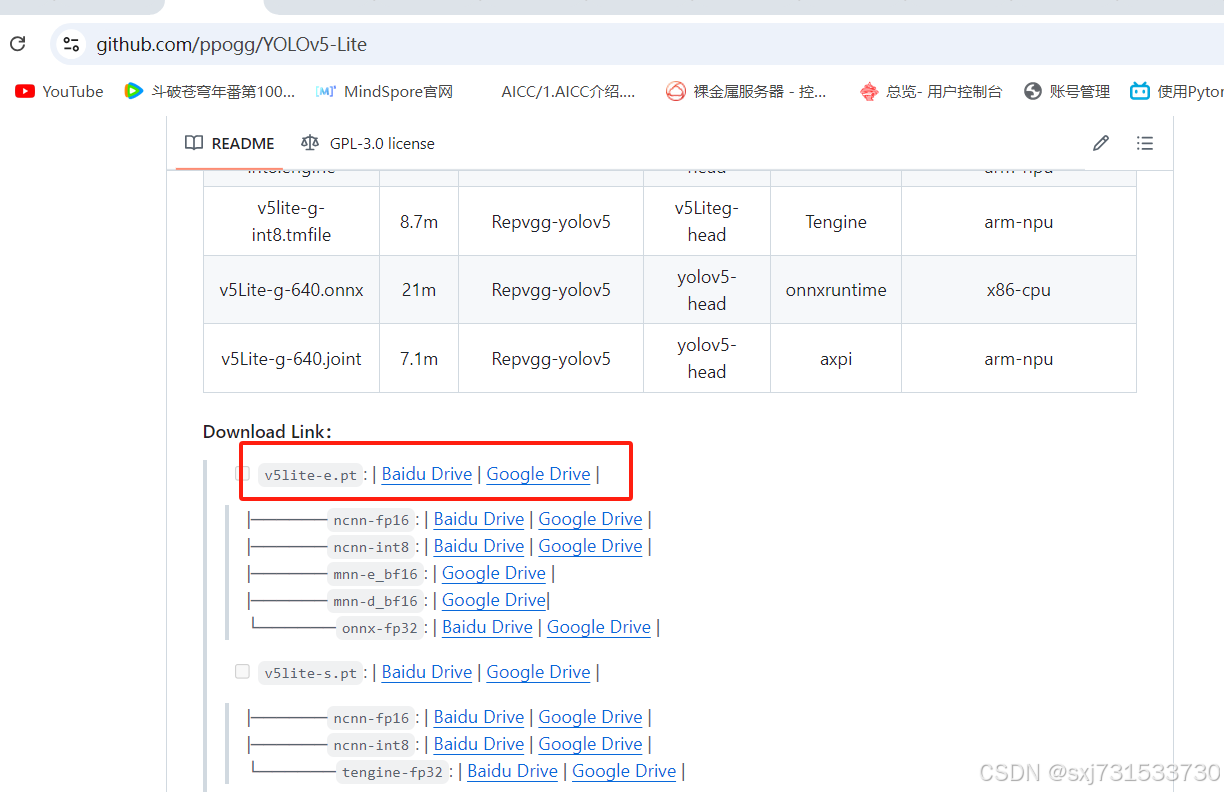
ubuntu@ubuntu:~$ git clone https://github.com/ppogg/YOLOv5-Lite
模型代码,参考oak官方代码
转onnx模型和转openenvino模型 export_onnx.py见官方参考
ubuntu@ubuntu:~/YOLOv5-Lite$ pip3 install -r requirements.txt
ubuntu@ubuntu:~/YOLOv5-Lite$ python3 export_onnx.py -w v5lite-e.pt -imgsz 640
Namespace(blob=False, convert_tool='blobconverter', img_size=[640, 640],
input_model=PosixPath('/home/ubuntu/YOLOv5-Lite/v5lite-e.pt'), name='v5lite-e',
opset=12, output_dir=PosixPath('/home/ubuntu/YOLOv5-Lite'), shaves=6,
spatial_detection=False)
[18:12:38] INFO YOLOv5 v1.5-16-g9d649a6 torch 2.4.1+cu121 CPU

Fusing layer*******r/>[18:12:41] INFO Model Summary: 167 layers, 781205 parameters, 0 gradient******r/> 2.9 GFLOPS

INFO Starting ONNX export with onnx 1.16.1...
INFO Starting to simplify ONNX...
INFO ONNX export success, saved as:
/home/ubuntu/YOLOv5-Lite/v5lite-e.onnx
INFO anchors:
[10.0, 13.0, 16.0, 30.0, 33.0, 23.0, 30.0, 61.0,
62.0, 45.0, 59.0, 119.0, 116.0, 90.0, 156.0, 198.0, 373.0,
326.0]
INFO anchor_masks:
{'side80': [0, 1, 2], 'side40': [3, 4, 5], 'side20':
[6, 7, 8]}
INFO Anchors data export success, saved as:
/home/ubuntu/YOLOv5-Lite/v5lite-e.json
INFO Export complete (3.61*****************************************r/>ubuntu@ubuntu:~/YOLOv5-Lite$ python3 /opt/intel/openvino_2021/deployment_tool***odel_optimizer/mo.py --input_model v5lite-e.onnx --output_dir /home/ubuntu/YOLOv5-Lite/saved/FP16 --input_shape [1,3,640,640] --data_type FP16 --scale_values [255.0,255.0,255.0] --mean_values [0,0,0]
Model Optimizer arguments:
Common parameters:
- Path to the Input Model: /home/ubuntu/YOLOv5-Lite/v5lite-e.onnx
- Path for generated IR: /home/ubuntu/YOLOv5-Lite/saved/FP16
- IR output name: v5lite-e
- Log level: ERROR
- Batch: Not specified, inherited from the model
- Input layers: Not specified, inherited from the model
- Output layers: Not specified, inherited from the model
- Input shapes: [1,3,640,640]
- Mean values: [0,0,0]
- Scale values: [255.0,255.0,255.0]
- Scale factor: Not specified
- Precision of IR: FP16
- Enable fusing: True
- Enable grouped convolutions fusing: True
- Move mean values to preprocess section: None
- Reverse input channels: False
ONNX specific parameters:
- Inference Engine found in: /opt/intel/openvino_2021/python/python3.8/openvino
Inference Engine version: 2021.4.1-3926-14e67d86634-releases/2021/4
Model Optimizer version: 2021.4.1-3926-14e67d86634-releases/2021/4
[ WARNING ]
Detected not satisfied dependencies:
networkx: installed: 3.1, required: ~= 2.5
numpy: installed: 1.23.5, required: < 1.20

Please install required versions of components or use install_prerequisites script
/opt/intel/openvino_2021.4.689/deployment_tool***odel_optimizer/install_prerequisites/install_prerequisites_onnx.sh
Note that install_prerequisites script***ay install additional component****r/>/opt/intel/openvino_2021/deployment_tool***odel_optimizer/extensions/front/onnx/parameter_ext.py:20: DeprecationWarning: `mapping.TENSOR_TYPE_TO_NP_TYPE` is now deprecated and will be removed in a future release.To silence this warning, please use `helper.tensor_dtype_to_np_dtype` instead.
'data_type': TENSOR_TYPE_TO_NP_TYPE[t_type.elem_type]
/opt/intel/openvino_2021/deployment_tool***odel_optimizer/extensions/****ysi***oolean_input.py:13: DeprecationWarning: `np.bool` is a deprecated alias for the builtin `bool`. To silence this warning, use `bool` by itself. Doing this will not modify any behavior and is safe. If you specifically wanted the numpy scalar type, use `np.bool_` here.
Deprecated in NumPy 1.20; for more details and guidance: https://numpy.org/devdocs/release/1.20.0-notes.html#deprecation***r/> nodes = graph.get_op_nodes(op='Parameter', data_type=np.bool)
/opt/intel/openvino_2021/deployment_tool***odel_optimizer/mo/front/common/partial_infer/concat.py:36: DeprecationWarning: `np.bool` is a deprecated alias for the builtin `bool`. To silence this warning, use `bool` by itself. Doing this will not modify any behavior and is safe. If you specifically wanted the numpy scalar type, use `np.bool_` here.
Deprecated in NumPy 1.20; for more details and guidance: https://numpy.org/devdocs/release/1.20.0-notes.html#deprecation***r/> mask = np.zeros_like(shape, dtype=np.bool)
[ WARNING ] Const node '/model.8/Resize/Add_input_port_1/value338417277' returns shape values of 'float64' type but it must be integer or float32. During Elementwise type inference will attempt to cast to float32
[ WARNING ] Const node '/model.12/Resize/Add_input_port_1/value341817280' returns shape values of 'float64' type but it must be integer or float32. During Elementwise type inference will attempt to cast to float32
[ WARNING ] Changing Const node '/model.8/Resize/Add_input_port_1/value338418006' data type from float16 to <class 'numpy.float32'> for Elementwise operation
[ WARNING ] Changing Const node '/model.12/Resize/Add_input_port_1/value341817580' data type from float16 to <class 'numpy.float32'> for Elementwise operation
[ SUCCESS ] Generated IR version 10 model.
[ SUCCESS ] XML file: /home/ubuntu/YOLOv5-Lite/saved/FP16/v5lite-e.xml
[ SUCCESS ] BIN file: /home/ubuntu/YOLOv5-Lite/saved/FP16/v5lite-e.bin
[ SUCCESS ] Total execution time: 10.69 second*****r/>[ SUCCESS ] Memory consumed: 104 MB.
It'***een a while, check for a new version of Intel(R) Distribution of OpenVINO(TM) toolkit here https://software.intel.com/content/www/us/en/develop/tools/openvino-toolkit/download.html?cid=other&source=prod&campid=ww_2021_bu_IOTG_OpenVINO-2021-4-LTS&content=upg_all&medium=organic or on the GitHub*
ubuntu@ubuntu:~/YOLOv5-Lite$
转换模型
ubuntu@ubuntu:~$ find . -name "mo_onnx.py"
./.local/lib/python3.10/site-packages/openvino/tool***o/mo_onnx.py
ubuntu@ubuntu:~$ python3 ./.local/lib/python3.10/site-packages/openvino/tool***o/mo_onnx.py --input_model v5lite-e.onnx --output_dir /home/ubuntu/YOLOv5-Lite/saved/FP16 --input_shape [1,3,640,640] --data_type FP16 --scale_values [255.0,255.0,255.0] --mean_values [0,0,0]
[ WARNING ] Use of deprecated cli option --data_type detected. Option use in the following releases will be fatal.
Check for a new version of Intel(R) Distribution of OpenVINO(TM) toolkit here https://software.intel.com/content/www/us/en/develop/tools/openvino-toolkit/download.html?cid=other&source=prod&campid=ww_2023_bu_IOTG_OpenVINO-2022-3&content=upg_all&medium=organic or on https://github.com/openvinotoolkit/openvino
[ INFO ] The model was converted to IR v11, the latest model format that corresponds to the source DL framework input/output format. While IR v11 i***ackwards compatible with OpenVINO Inference Engine API v1.0, please use API v2.0 (as of 2022.1) to take advantage of the latest improvements in IR v11.
Find more information about API v2.0 and IR v11 at https://docs.openvino.ai/latest/openvino_2_0_transition_guide.html
[ SUCCESS ] Generated IR version 11 model.
[ SUCCESS ] XML file: /home/ubuntu/YOLOv5-Lite/saved/FP16/v5lite-e.xml
[ SUCCESS ] BIN file: /home/ubuntu/YOLOv5-Lite/saved/FP16/v5lite-e.bin
ubuntu@ubuntu:~$ pip3 install blobconverter
然后站blob

[setupvars.sh] OpenVINO environment initialized
ubuntu@ubuntu:~/YOLOv5-Lite$ cd /opt/intel/openvino_2021/deployment_tools/tool***r/>ubuntu@ubuntu:/opt/intel/openvino_2021/deployment_tools/tools$ sudo chmod 777 compile_tool/
[sudo] password for ubuntu:
ubuntu@ubuntu:/opt/intel/openvino_2021/deployment_tools/tools$ cd compile_tool/
ubuntu@ubuntu:/opt/intel/openvino_2021/deployment_tools/tools/compile_tool$ ./compile_tool -m /home/ubuntu/YOLOv5-Lite/saved/FP16/v5lite-e.xml -ip U8 -d MYRIAD -VPU_NUMBER_OF_SHAVES 4 -VPU_NUMBER_OF_CMX_SLICES 4
Inference Engine:
IE version ......... 2021.4.1
Build ........... 2021.4.1-3926-14e67d86634-releases/2021/4

Network inputs:
images : U8 / NCHW
Network outputs:
output1_yolov5 : FP16 / NCHW
output2_yolov5 : FP16 / NCHW
output3_yolov5 : FP16 / NCHW
[Warning][VPU][Config] Deprecated option was used : VPU_MYRIAD_PLATFORM
Done. LoadNetwork time elapsed: 6529 m***r/>ubuntu@ubuntu:/opt/intel/openvino_2021/deployment_tools/tools/compile_tool$ l***r/>compile_tool README.md v5lite-e.blob
导出模型,先在oak相机上试试,这个整个模型都是在oak相机端进行推理和测距,只能说这个开发板是支持oak这种深度相机使用的
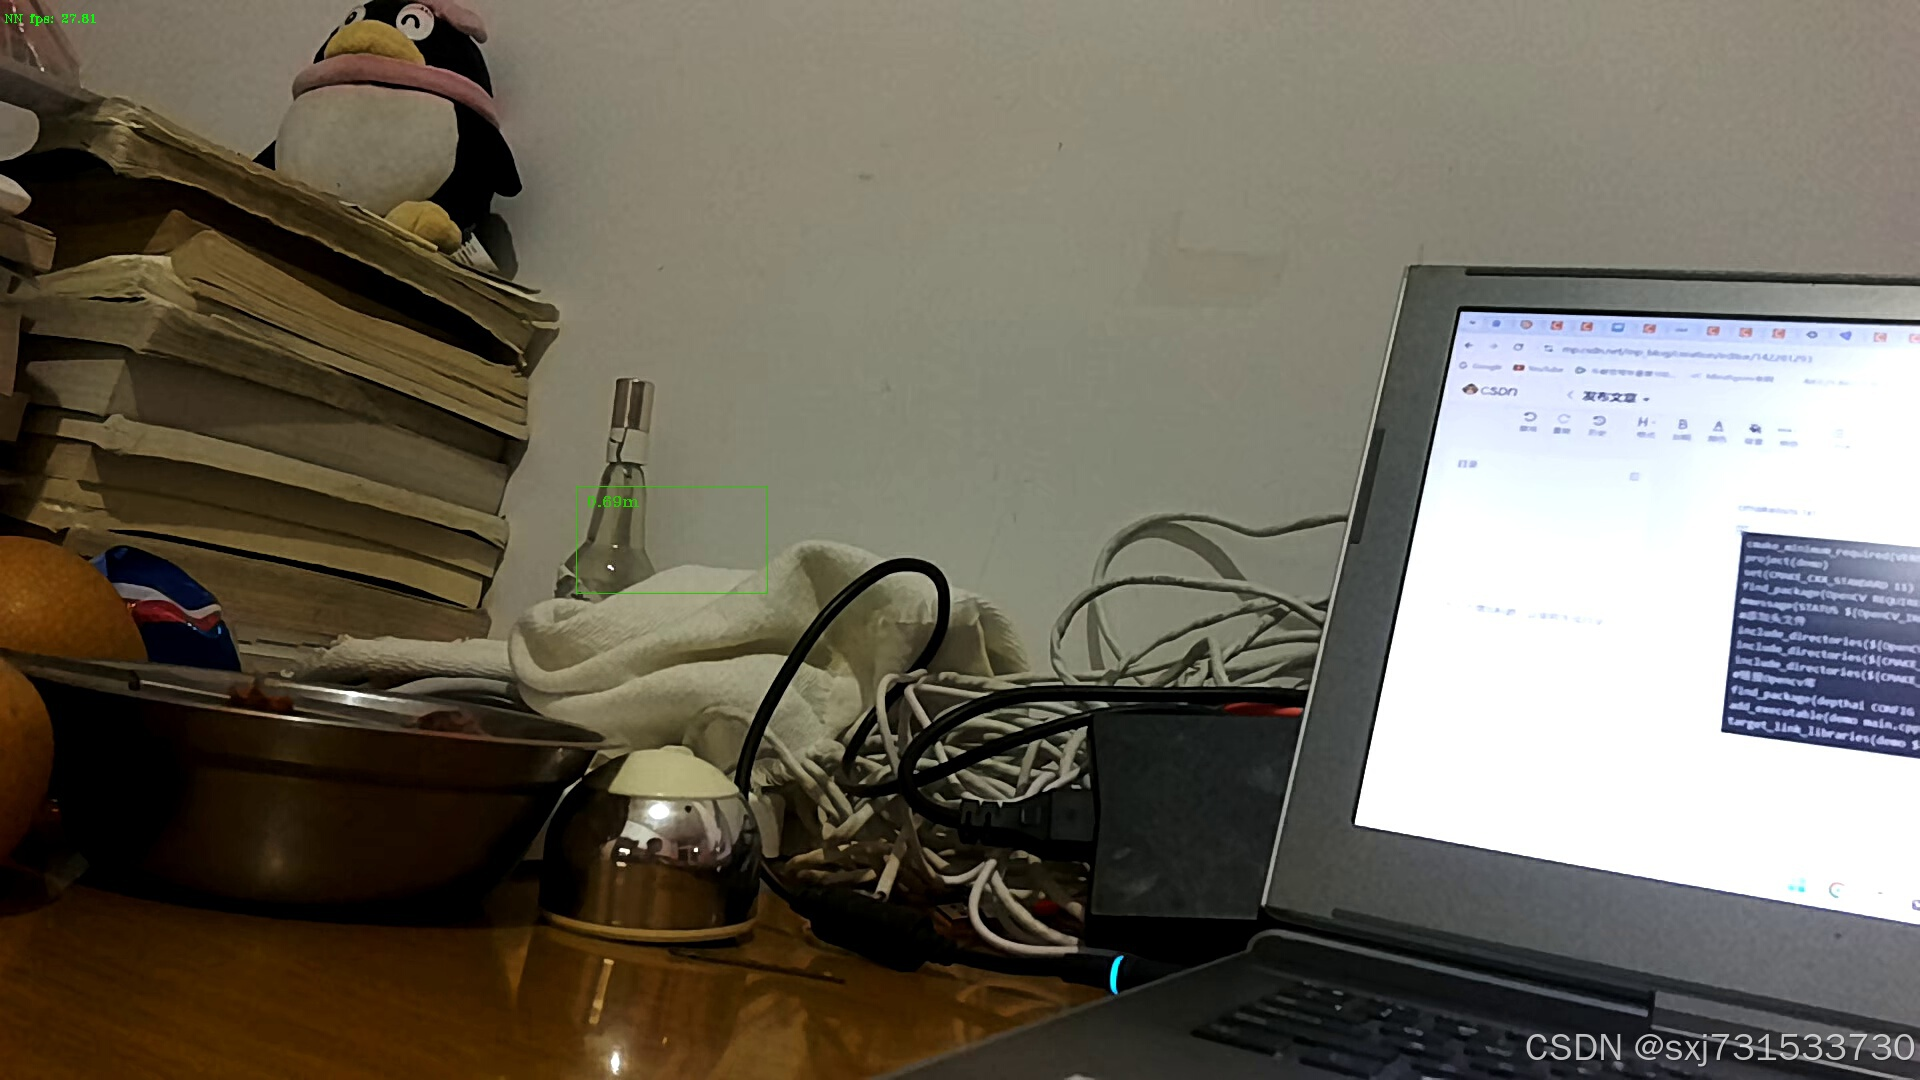
四、我们来修改我们的代码,将模型放在开发板上使用openvino推理,将测距功能仍然保持相机端推理,下面是使用clion远程调用开发板进行编译的代码,将深度相机OAK插在哪吒开发板的u**接口,将哪吒开发板插上显示器,然后进行相机调用,后续上传github
cmakelists.txt
cmake_minimum_required(VERSION 3.16)
project(demo)
set(CMAKE_CXX_STANDARD 11)
find_package(OpenCV REQUIRED)
#message(STATUS ${OpenCV_INCLUDE_DIRS})
#添加头文件
include_directories(${OpenCV_INCLUDE_DIRS})
include_directories(${CMAKE_SOURCE_DIR}/include)
include_directories(${CMAKE_SOURCE_DIR}/include/utility)
#链接Opencv库
find_package(depthai CONFIG REQUIRED)
add_executable(demo main.cpp include/utility/utility.cpp)
target_link_libraries(demo ${OpenCV_LIBS} depthai::opencv )
main.cpp

#include <iostream>
// Includes common necessary includes for development using depthai library
#include "depthai/depthai.hpp"

/*
The code is the same as for Tiny-yolo-V3, the only difference is the blob file.
The blob was compiled following this tutorial: https://github.com/TNTWEN/OpenVINO-YOLOV4
*/


static const std::vector<std::string> labelMap = {
"person", "bicycle", "car", "motorbike", "aeroplane", "bus", "train", "truck", "boat",
"traffic light", "fire hydrant", "stop sign", "parking meter", "bench", "bird", "cat", "dog", "horse",
"sheep", "cow", "elephant", "bear", "zebra", "giraffe", "backpack", "umbrella", "handbag",
"tie", "suitcase", "fri**ee", "skis", "snowboard", "sport***all", "kite", "baseball bat", "baseball glove",
"skateboard", "surfboard", "tennis racket", "bottle", "wine glass", "cup", "fork", "knife", "spoon",
"bowl", "banana", "apple", "sandwich", "orange", "broccoli", "carrot", "hot dog", "pizza",
"donut", "cake", "chair", "sofa", "pottedplant", "bed", "diningtable", "toilet", "tvmonitor",
"laptop", "mouse", "remote", "keyboard", "cell phone", "microwave", "oven", "toaster", "sink",
"refrigerator", "book", "clock", "vase", "scissors", "teddy bear", "hair drier", "toothbrush"};

static std::atomic<bool> syncNN{true};


int main() {
// Create pipeline
dai::Pipeline pipeline;

// Define source***r/> auto camRgb = pipeline.create<dai::node::ColorCamera>();
auto monoLeft = pipeline.create<dai::node::MonoCamera>();
auto monoRight = pipeline.create<dai::node::MonoCamera>();
auto stereo = pipeline.create<dai::node::StereoDepth>();
auto spatialDataCalculator = pipeline.create<dai::node::SpatialLocationCalculator>();


// Propertie***r/> camRgb->setPreviewSize(640, 640);
camRgb->setBoardSocket(dai::CameraBoardSocket::RGB);
camRgb->setResolution(dai::ColorCameraProperties::SensorResolution::THE_1080_P);
camRgb->setInterleaved(false);
camRgb->setColorOrder(dai::ColorCameraProperties::ColorOrder::RGB);
camRgb->setPreviewKeepAspectRatio(false); //将调整视频大小以适应预览大小,对齐

monoLeft->setBoardSocket(dai::CameraBoardSocket::LEFT);
monoLeft->setResolution(dai::MonoCameraProperties::SensorResolution::THE_720_P);
monoRight->setBoardSocket(dai::CameraBoardSocket::RIGHT);
monoRight->setResolution(dai::MonoCameraProperties::SensorResolution::THE_720_P);


stereo->setDefaultProfilePreset(dai::node::StereoDepth::PresetMode::HIGH_ACCURACY);
stereo->setLeftRightCheck(true);
stereo->setDepthAlign(dai::CameraBoardSocket::RGB);
stereo->setExtendedDisparity(true);

dai::Point2f topLeft(0.4f, 0.4f);
dai::Point2f bottomRight(0.6f, 0.6f);

dai::SpatialLocationCalculatorConfigData config;
config.depthThresholds.lowerThreshold = 100;
config.depthThresholds.upperThreshold = 10000;
config.roi = dai::Rect(topLeft, bottomRight);

spatialDataCalculator->initialConfig.addROI(config);
spatialDataCalculator->inputConfig.setWaitForMessage(false);


// Network specific setting***r/> auto detectionNetwork = pipeline.create<dai::node::YoloDetectionNetwork>();
detectionNetwork->setBlob("../v5lite-e.blob");
detectionNetwork->setConfidenceThreshold(0.5);
//Yolo specific parameter***r/> detectionNetwork->setNumClasses(80);
detectionNetwork->setCoordinateSize(4);
detectionNetwork->setAnchors({10,13,16,30,33,23,30,61,62,45,59,119,116,90,156,198,373,326});
detectionNetwork->setAnchorMasks({{{"side80",{0, 1, 2}},{"side40",{3, 4, 5}},{"side20",{6, 7, 8}}}});
detectionNetwork->setIouThreshold(0.5);

// rgb输出
auto xoutRgb = pipeline.create<dai::node::XLinkOut>();
xoutRgb->setStreamName("rgb");

// depth输出
auto xoutDepth = pipeline.create<dai::node::XLinkOut>();
xoutDepth->setStreamName("depth");

// 测距模块数据输出
auto xoutSpatialData = pipeline.create<dai::node::XLinkOut>();
xoutSpatialData->setStreamName("spatialData");

// 测距模块配置输入
auto xinSpatialCalcConfig = pipeline.create<dai::node::XLinkIn>();
xinSpatialCalcConfig->setStreamName("spatialCalcConfig");


// Linking preview 画布 video 实时分辨率
camRgb->video.link(xoutRgb->input); //显示用video
camRgb->preview.link(detectionNetwork->input); //推理用preview
monoLeft->out.link(stereo->left);
monoRight->out.link(stereo->right);

spatialDataCalculator->passthroughDepth.link(xoutDepth->input);
stereo->depth.link(spatialDataCalculator->inputDepth);

spatialDataCalculator->out.link(xoutSpatialData->input);
xinSpatialCalcConfig->out.link(spatialDataCalculator->inputConfig);


// output
auto xlinkParseOut = pipeline.create<dai::node::XLinkOut>();
xlinkParseOut->setStreamName("parseOut");

auto xlinkoutOut = pipeline.create<dai::node::XLinkOut>();
xlinkoutOut->setStreamName("out");

auto xlinkPassthroughOut = pipeline.create<dai::node::XLinkOut>();
xlinkPassthroughOut->setStreamName("passthrough");


detectionNetwork->out.link(xlinkParseOut->input);
detectionNetwork->passthrough.link(xlinkPassthroughOut->input);


// Connect to device and start pipeline
dai::Device device;

device.setIrLaserDotProjectorBrightness(1000);
device.setIrFloodLightBrightness(0);
device.startPipeline(pipeline);

// Output queues will be used to get the rgb frames and nn data from the outputs defined above
auto detectQueue = device.getOutputQueue("parseOut",8,false);
auto passthQueue = device.getOutputQueue("passthrough", 8, false);
auto depthQueue = device.getOutputQueue("depth", 8, false);
auto spatialCalcQueue = device.getOutputQueue("spatialData", 8, false);
auto spatialCalcConfigInQueue = device.getInputQueue("spatialCalcConfig", 8, false);
auto rgbQueue = device.getOutputQueue("rgb", 8, false);

bool printOutputLayersOnce = true;
auto color = cv::Scalar(0,255,0);


std::vector<dai::ImgDetection> detection****r/> auto startTime = std::chrono::steady_clock::now();
int counter = 0;
float fps = 0;
auto color2 = cv::Scalar(255, 255, 255);
cv::Scalar color1 = cv::Scalar(0, 0, 255);

while (true) {
counter++;
auto currentTime = std::chrono::steady_clock::now();
auto elapsed = std::chrono::duration_cast<std::chrono::duration<float>>(currentTime - startTime);
if(elapsed > std::chrono::seconds(1)) {
fps = counter / elapsed.count();
counter = 0;
startTime = currentTime;
}

std::shared_ptr<dai::ImgFrame> inRgb = rgbQueue->get<dai::ImgFrame>();
std::shared_ptr<dai::ImgFrame> inDepth = depthQueue->get<dai::ImgFrame>();
std::shared_ptr<dai::ImgDetections> inDet = detectQueue->get<dai::ImgDetections>();
std::shared_ptr<dai::ImgFrame> ImgFrame = passthQueue->get<dai::ImgFrame>();

cv::Mat frame = inRgb->getCvFrame();
cv::Mat src = ImgFrame->getCvFrame();

cv::Mat depthFrameColor;
cv::Mat depthFrame = inDepth->getFrame();
cv::normalize(depthFrame, depthFrameColor, 255, 0, cv::NORM_INF, CV_8UC1);
cv::equalizeHist(depthFrameColor, depthFrameColor);
cv::applyColorMap(depthFrameColor, depthFrameColor, cv::COLORMAP_HOT);

inDet = detectQueue->get<dai::ImgDetections>();
if(inDet) {
detections = inDet->detection****r/> for(auto& detection : detection******r/> int x1 = detection.xmin * src.col****r/> int y1 = detection.ymin * src.row****r/> int x2 = detection.xmax * src.col****r/> int y2 = detection.ymax * src.row****r/>
uint32_t labelIndex = detection.label;
std::string labelStr = std::to_string(labelIndex);
if(labelIndex < labelMap.size()) {
labelStr = labelMap[labelIndex];
}
cv::putText(src, labelStr, cv::Point(x1 + 10, y1 + 20), cv::FONT_HERSHEY_TRIPLEX, 0.5, 255);
std::stringstream confStr;
confStr << std::fixed << std::setprecision(2) << detection.confidence * 100;
cv::putText(src, confStr.str(), cv::Point(x1 + 10, y1 + 40), cv::FONT_HERSHEY_TRIPLEX, 0.5, 255);
cv::rectangle(src, cv::Rect(cv::Point(x1, y1), cv::Point(x2, y2)), color, cv::FONT_HERSHEY_SIMPLEX);

// 1920*1080
//cv::rectangle(depthFrameColor, cv::Rect(cv::Point(x1, y1), cv::Point(x2, y2)), color, cv::FONT_HERSHEY_SIMPLEX);
int top_left_x = detection.xmin * frame.col****r/> int top_left_y = detection.ymin * frame.row****r/> int bottom_right_x = detection.xmax * frame.col****r/> int bottom_right_y = detection.ymax * frame.row****r/>
// 最值限定
top_left_x = top_left_x < 0 ? 0 : top_left_x;
bottom_right_x = bottom_right_x > frame.cols - 1 ? frame.cols - 1 : bottom_right_x;
top_left_y = top_left_y < 0 ? 0 : top_left_y;
bottom_right_y = bottom_right_y > frame.rows - 1 ? frame.rows - 1 : bottom_right_y;

topLeft.x = top_left_x;
topLeft.y = top_left_y;
bottomRight.x = bottom_right_x;
bottomRight.y = bottom_right_y;

// 测距模块推送实际像素大小的ROI
config.roi = dai::Rect(topLeft, bottomRight);
dai::SpatialLocationCalculatorConfig cfg;
cfg.addROI(config);
spatialCalcConfigInQueue->send(cfg);
std::vector<dai::SpatialLocations> spatialData = spatialCalcQueue->get<dai::SpatialLocationCalculatorData>()->getSpatialLocation******r/>
for (auto &depthData : spatialData) {
auto roi = depthData.config.roi;
roi = roi.denormalize(depthFrameColor.cols, depthFrameColor.row*****r/> auto xmin = (int) roi.topLeft().x;
auto ymin = (int) roi.topLeft().y;
auto xmax = (int) roi.bottomRight().x;
auto ymax = (int) roi.bottomRight().y;

// 最值限定
// xmin = xmin < 0 ? 0 : xmin;
// xmax = xmax > frame.cols - 1 ? frame.cols - 1 : xmax;
// ymin = ymin < 0 ? 0 : ymin;
// ymax = ymax > frame.rows - 1 ? frame.rows - 1 : ymax;

auto coords = depthData.spatialCoordinate****r/> auto distance = std::sqrt(coords.x * coords.x + coords.y * coords.y + coords.z * coords.z);
auto fontType = cv::FONT_HERSHEY_TRIPLEX;

std::stringstream rgb_depthX, depthX, rgb_depthX_;
rgb_depthX << "X: " << (int) coords.x << " mm";
rgb_depthX_.precision(2);
rgb_depthX_ << "dis: " << std::fixed << static_cast<float>(distance) << " mm";

cv::rectangle(frame,
cv::Rect(cv::Point(xmin, ymin), cv::Point(xmax, ymax)),
color,
fontType);

cv::putText(frame, rgb_depthX_.str(), cv::Point(xmin + 10, ymin - 20),
fontType,
0.5, color1);

cv::putText(frame, rgb_depthX.str(), cv::Point(xmin + 10, ymin + 20),
fontType,
0.5, color1);
std::stringstream rgb_depthY, depthY;
rgb_depthY << "Y: " << (int) coords.y << " mm";
cv::putText(frame, rgb_depthY.str(), cv::Point(xmin + 10, ymin + 35),
fontType,
0.5, color1);
std::stringstream rgb_depthZ, depthZ;
rgb_depthZ << "Z: " << (int) coords.z << " mm";
cv::putText(frame, rgb_depthZ.str(), cv::Point(xmin + 10, ymin + 50),
fontType,
0.5, color1);


cv::rectangle(depthFrameColor,
cv::Rect(cv::Point(xmin, ymin), cv::Point(xmax, ymax)),
color,
fontType);
depthX << "X: " << (int) coords.x << " mm";
cv::putText(depthFrameColor, depthX.str(), cv::Point(xmin + 10, ymin + 20),
fontType, 0.5, color1);
depthY << "Y: " << (int) coords.y << " mm";
cv::putText(depthFrameColor, depthY.str(), cv::Point(xmin + 10, ymin + 35),
fontType, 0.5, color1);
depthZ << "Z: " << (int) coords.z << " mm";
cv::putText(depthFrameColor, depthZ.str(), cv::Point(xmin + 10, ymin + 50),
fontType, 0.5, color1);
}
}

std::stringstream fpsStr;
fpsStr << "NN fps: " << std::fixed << std::setprecision(2) << fp****r/>// printf("fps %f\n",fp*****r/> cv::putText(src, fpsStr.str(), cv::Point(4, 22), cv::FONT_HERSHEY_TRIPLEX, 1,
cv::Scalar(0, 255, 0));
cv::putText(frame, fpsStr.str(), cv::Point(4, 22), cv::FONT_HERSHEY_TRIPLEX, 1,
cv::Scalar(0, 255, 0));

// Show the frame
// cv::imshow("src", src);
cv::imshow("frame", frame);
cv::imwrite("frame.jpg", frame);
// cv::imshow("depth", depthFrameColor);
int key = cv::waitKey(1);
if(key == 'q' || key == 'Q' || key == 27) {
return 0;
}
}
}
}
然后将在相机端的推理代码踢掉,使用本地开发板哪吒进行推理,然后整体替换openvino推理方式,
1)先改个用编解码的方式获取相机,测距,使用cpu进行纯h264解码,纯cpu解码30帧左右,看样子还行,这小板子的cpu软解看着还凑合
cmakelists.txt
cmake_minimum_required(VERSION 3.16)
project(demo)
set(CMAKE_CXX_STANDARD 11)
find_package(OpenCV REQUIRED)
#message(STATUS ${OpenCV_INCLUDE_DIRS})
#添加头文件
include_directories(${OpenCV_INCLUDE_DIRS})
include_directories(${CMAKE_SOURCE_DIR}/include)
include_directories(${CMAKE_SOURCE_DIR}/include/utility)
#链接Opencv库
find_package(depthai CONFIG REQUIRED)
add_executable(demo main.cpp include/utility/utility.cpp)
target_link_libraries(demo ${OpenCV_LIBS} depthai::opencv -lavformat -lavcodec -lswscale -lavutil -lz)
main.cpp

#include <stdio.h>
#include <string>
#include <iostream>
#include <opencv2/core/core.hpp>
#include <opencv2/highgui/highgui.hpp>
#include <opencv2/imgproc/imgproc.hpp>
#include <opencv2/imgcodecs.hpp>
extern "C"
{
#include <libavformat/avformat.h>
#include <libavcodec/avcodec.h>
#include <libavutil/imgutils.h>
#include <libswscale/swscale.h>
}


#include "utility.hpp"

#include "depthai/depthai.hpp"

using namespace std::chrono;

int main(int argc, char **argv) {
dai::Pipeline pipeline;
//定义
auto cam = pipeline.create<dai::node::ColorCamera>();
cam->setBoardSocket(dai::CameraBoardSocket::RGB);
cam->setResolution(dai::ColorCameraProperties::SensorResolution::THE_1080_P);
cam->setVideoSize(1920, 1080);
cam->setFps(30);
auto Encoder = pipeline.create<dai::node::VideoEncoder>();
Encoder->setDefaultProfilePreset(cam->getVideoSize(), cam->getFp******r/> dai::VideoEncoderProperties::Profile::H265_MAIN);


cam->video.link(Encoder->input);

auto monoLeft = pipeline.create<dai::node::MonoCamera>();
auto monoRight = pipeline.create<dai::node::MonoCamera>();
auto stereo = pipeline.create<dai::node::StereoDepth>();
auto spatialLocationCalculator = pipeline.create<dai::node::SpatialLocationCalculator>();

auto xoutDepth = pipeline.create<dai::node::XLinkOut>();
auto xoutSpatialData = pipeline.create<dai::node::XLinkOut>();
auto xinSpatialCalcConfig = pipeline.create<dai::node::XLinkIn>();
auto xoutRgb = pipeline.create<dai::node::XLinkOut>();
xoutDepth->setStreamName("depth");
xoutSpatialData->setStreamName("spatialData");
xinSpatialCalcConfig->setStreamName("spatialCalcConfig");
xoutRgb->setStreamName("rgb");

monoLeft->setResolution(dai::MonoCameraProperties::SensorResolution::THE_400_P);
monoLeft->setBoardSocket(dai::CameraBoardSocket::LEFT);
monoRight->setResolution(dai::MonoCameraProperties::SensorResolution::THE_400_P);
monoRight->setBoardSocket(dai::CameraBoardSocket::RIGHT);

stereo->setDefaultProfilePreset(dai::node::StereoDepth::PresetMode::HIGH_ACCURACY);
stereo->setLeftRightCheck(true);
stereo->setExtendedDisparity(true);
spatialLocationCalculator->inputConfig.setWaitForMessage(false);


dai::SpatialLocationCalculatorConfigData config;
config.depthThresholds.lowerThreshold = 200;
config.depthThresholds.upperThreshold = 10000;
config.roi = dai::Rect(dai::Point2f( 0.1, 0.45), dai::Point2f(( 1) * 0.1, 0.55));
spatialLocationCalculator->initialConfig.addROI(config);

// Linking
monoLeft->out.link(stereo->left);
monoRight->out.link(stereo->right);

spatialLocationCalculator->passthroughDepth.link(xoutDepth->input);
stereo->depth.link(spatialLocationCalculator->inputDepth);

spatialLocationCalculator->out.link(xoutSpatialData->input);
xinSpatialCalcConfig->out.link(spatialLocationCalculator->inputConfig);


//定义输出
auto xlinkoutpreviewOut = pipeline.create<dai::node::XLinkOut>();
xlinkoutpreviewOut->setStreamName("out");

Encoder->bitstream.link(xlinkoutpreviewOut->input);


//结构推送相机
dai::Device device(pipeline);
device.setIrLaserDotProjectorBrightness(1000);

//取帧显示
auto outqueue = device.getOutputQueue("out", cam->getFps(), false);//maxsize 代表缓冲数据
auto depthQueue = device.getOutputQueue("depth", 4, false);
auto spatialCalcQueue = device.getOutputQueue("spatialData", 4, false);

//auto videoFile = std::ofstream("video.h265", std::ios::binary);


int width = 1920;
int height = 1080;
AVCodec *pCodec = avcodec_find_decoder(AV_CODEC_ID_H265);
AVCodecContext *pCodecCtx = avcodec_alloc_context3(pCodec);
int ret = avcodec_open2(pCodecCtx, pCodec, NULL);
if (ret < 0) {//打开解码器
printf("Could not open codec.\n");
return -1;
}
AVFrame *picture = av_frame_alloc();
picture->width = width;
picture->height = height;
picture->format = AV_PIX_FMT_YUV420P;
ret = av_frame_get_buffer(picture, 1);
if (ret < 0) {
printf("av_frame_get_buffer error\n");
return -1;
}
AVFrame *pFrame = av_frame_alloc();
pFrame->width = width;
pFrame->height = height;
pFrame->format = AV_PIX_FMT_YUV420P;
ret = av_frame_get_buffer(pFrame, 1);
if (ret < 0) {
printf("av_frame_get_buffer error\n");
return -1;
}
AVFrame *pFrameRGB = av_frame_alloc();
pFrameRGB->width = width;
pFrameRGB->height = height;
pFrameRGB->format = AV_PIX_FMT_RGB24;
ret = av_frame_get_buffer(pFrameRGB, 1);
if (ret < 0) {
printf("av_frame_get_buffer error\n");
return -1;
}


int picture_size = av_image_get_buffer_size(AV_PIX_FMT_YUV420P, width, height,
1);//计算这个格式的图片,需要多少字节来存储
uint8_t *out_buff = (uint8_t *) av_malloc(picture_size * sizeof(uint8_t));
av_image_fill_arrays(picture->data, picture->linesize, out_buff, AV_PIX_FMT_YUV420P, width,
height, 1);
//这个函数 是缓存转换格式,可以不用 以为上面已经设置了AV_PIX_FMT_YUV420P
SwsContext *img_convert_ctx = sws_getContext(width, height, AV_PIX_FMT_YUV420P,
width, height, AV_PIX_FMT_RGB24, 4,
NULL, NULL, NULL);
AVPacket *packet = av_packet_alloc();

auto startTime = steady_clock::now();
int counter = 0;
float fps = 0;
auto spatialCalcConfigInQueue = device.getInputQueue("spatialCalcConfig");
while (true) {
counter++;
auto currentTime = steady_clock::now();
auto elapsed = duration_cast<duration<float>>(currentTime - startTime);
if (elapsed > seconds(1)) {
fps = counter / elapsed.count();
counter = 0;
startTime = currentTime;
}


auto h265Packet = outqueue->get<dai::ImgFrame>();


//videoFile.write((char *) (h265Packet->getData().data()), h265Packet->getData().size());

packet->data = (uint8_t *) h265Packet->getData().data(); //这里填入一个指向完整H264数据帧的指针
packet->size = h265Packet->getData().size(); //这个填入H265 数据帧的大小
packet->stream_index = 0;
ret = avcodec_send_packet(pCodecCtx, packet);
if (ret < 0) {
printf("avcodec_send_packet \n");
continue;
}
av_packet_unref(packet);
int got_picture = avcodec_receive_frame(pCodecCtx, pFrame);
av_frame_is_writable(pFrame);
if (got_picture < 0) {
printf("avcodec_receive_frame \n");
continue;
}

sws_scale(img_convert_ctx, pFrame->data, pFrame->linesize, 0,
height,
pFrameRGB->data, pFrameRGB->linesize);


cv::Mat mRGB(cv::Size(width, height), CV_8UC3);
mRGB.data = (unsigned char *) pFrameRGB->data[0];
cv::Mat mBGR;
cv::cvtColor(mRGB, mBGR, cv::COLOR_RGB2BGR);
std::stringstream fpsStr;
fpsStr << "NN fps: " << std::fixed << std::setprecision(2) << fp****r/> printf("fps %f\n",fp*****r/> cv::putText(mBGR, fpsStr.str(), cv::Point(4, 22), cv::FONT_HERSHEY_TRIPLEX, 0.4,
cv::Scalar(0, 255, 0));


config.roi = dai::Rect(dai::Point2f(3 * 0.1, 0.45), dai::Point2f((3 + 1) * 0.1, 0.55));
dai::SpatialLocationCalculatorConfig cfg;
cfg.addROI(config);
spatialCalcConfigInQueue->send(cfg);

// auto inDepth = depthQueue->get<dai::ImgFrame>();
//cv::Mat depthFrame = inDepth->getFrame(); // depthFrame values are in millimeter***r/>

auto spatialData = spatialCalcQueue->get<dai::SpatialLocationCalculatorData>()->getSpatialLocation******r/> for(auto depthData : spatialData) {
auto roi = depthData.config.roi;
roi = roi.denormalize(mBGR.col****BGR.row*****r/>
auto xmin = static_cast<int>(roi.topLeft().x);
auto ymin = static_cast<int>(roi.topLeft().y);
auto xmax = static_cast<int>(roi.bottomRight().x);
auto ymax = static_cast<int>(roi.bottomRight().y);

auto coords = depthData.spatialCoordinate****r/> auto distance = std::sqrt(coords.x * coords.x + coords.y * coords.y + coords.z * coords.z);
auto color = cv::Scalar(0, 200, 40);
auto fontType = cv::FONT_HERSHEY_TRIPLEX;
cv::rectangle(mBGR, cv::Rect(cv::Point(xmin, ymin), cv::Point(xmax, ymax)), color);
std::stringstream depthDistance;
depthDistance.precision(2);
depthDistance << std::fixed << static_cast<float>(distance / 1000.0f) << "m";
cv::putText(mBGR, depthDistance.str(), cv::Point(xmin + 10, ymin + 20), fontType, 0.5, color);
}


cv::imshow("demo", mBGR);
cv::imwrite("demo.jpg",mBGR);

cv::waitKey(1);


}


return 0;
}
整个代码在哪吒开发板上进行解码,帧率达到30fps左右,还可以,图片就不上传了,大家可以自己评测,前提安装ffmpeg这个库
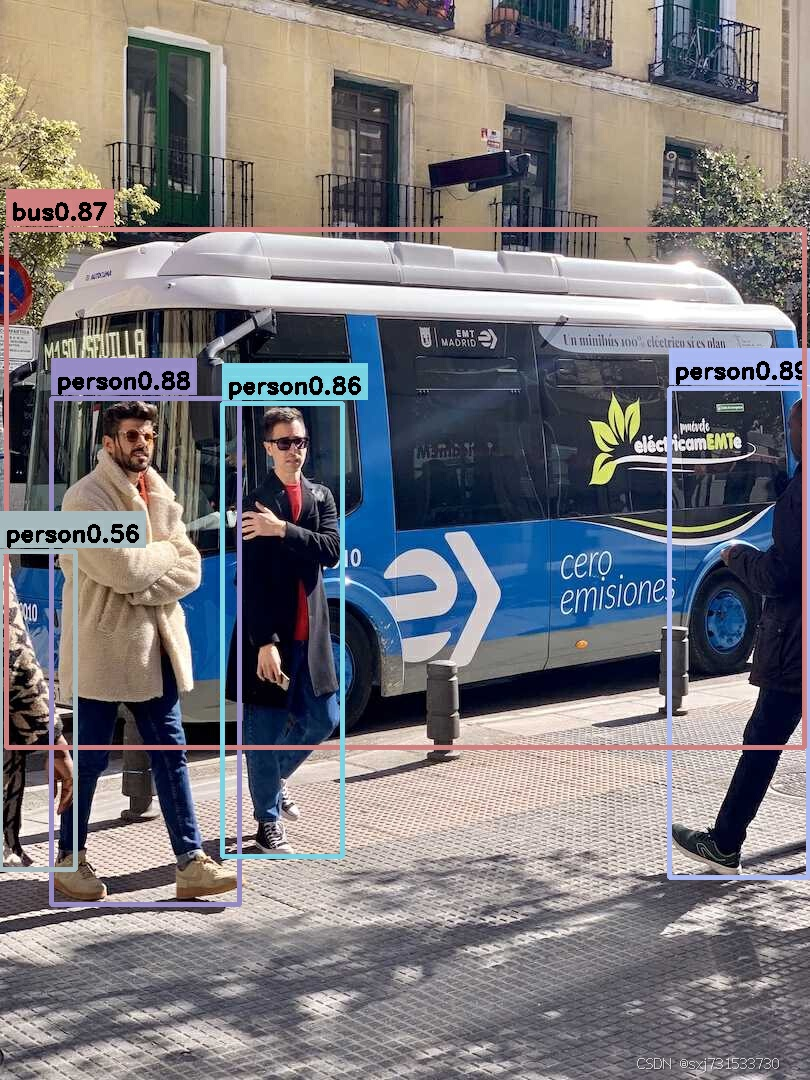
2)v8的模型转换和开发板上推理,这个地方一定要保证opset=11,如果是14是不可以的,模型转换可以在开发板上转换就行
ubuntu@ubuntu:~$ pip install ultralytic***r/>
转换代码
ubuntu@ubuntu:~$ cat convert_yolov8.py
from ultralytics import YOLO

# Load a model
model = YOLO("yolov8n.yaml") # build a new model from scratch
model = YOLO("yolov8n.pt") # load a pretrained model (recommended for training)

# Use the model
# model.train(data="coco8.yaml", epochs=3) # train the model
# metric*****odel.val() # evaluate model performance on the validation set
result*****odel("https://ultralytics.com/image***us.jpg") # predict on an image
path = model.export(format="onnx") # export the model to ONNX format
path = model.export(format="openvino",opset=11) # export the model to ONNX format
cmkelists.txt

cmake_minimum_required(VERSION 3.12)
project(yolov8_openvino_example)

set(CMAKE_CXX_STANDARD 14)

find_package(OpenCV REQUIRED)

include_directorie****r/> ${OpenCV_INCLUDE_DIRS}
/opt/intel/openvino_2023/runtime/include
)

add_executable(detect
main.cc
inference.cc
)

target_link_libraries(detect
${OpenCV_LIBS}
/opt/intel/openvino_2023/runtime/lib/intel64/libopenvino.so
)
测试代码使用官方的即可 ultralytics/examples/YOLOv8-OpenVINO-CPP-Inference at main · ultralytics/ultralytics · GitHub
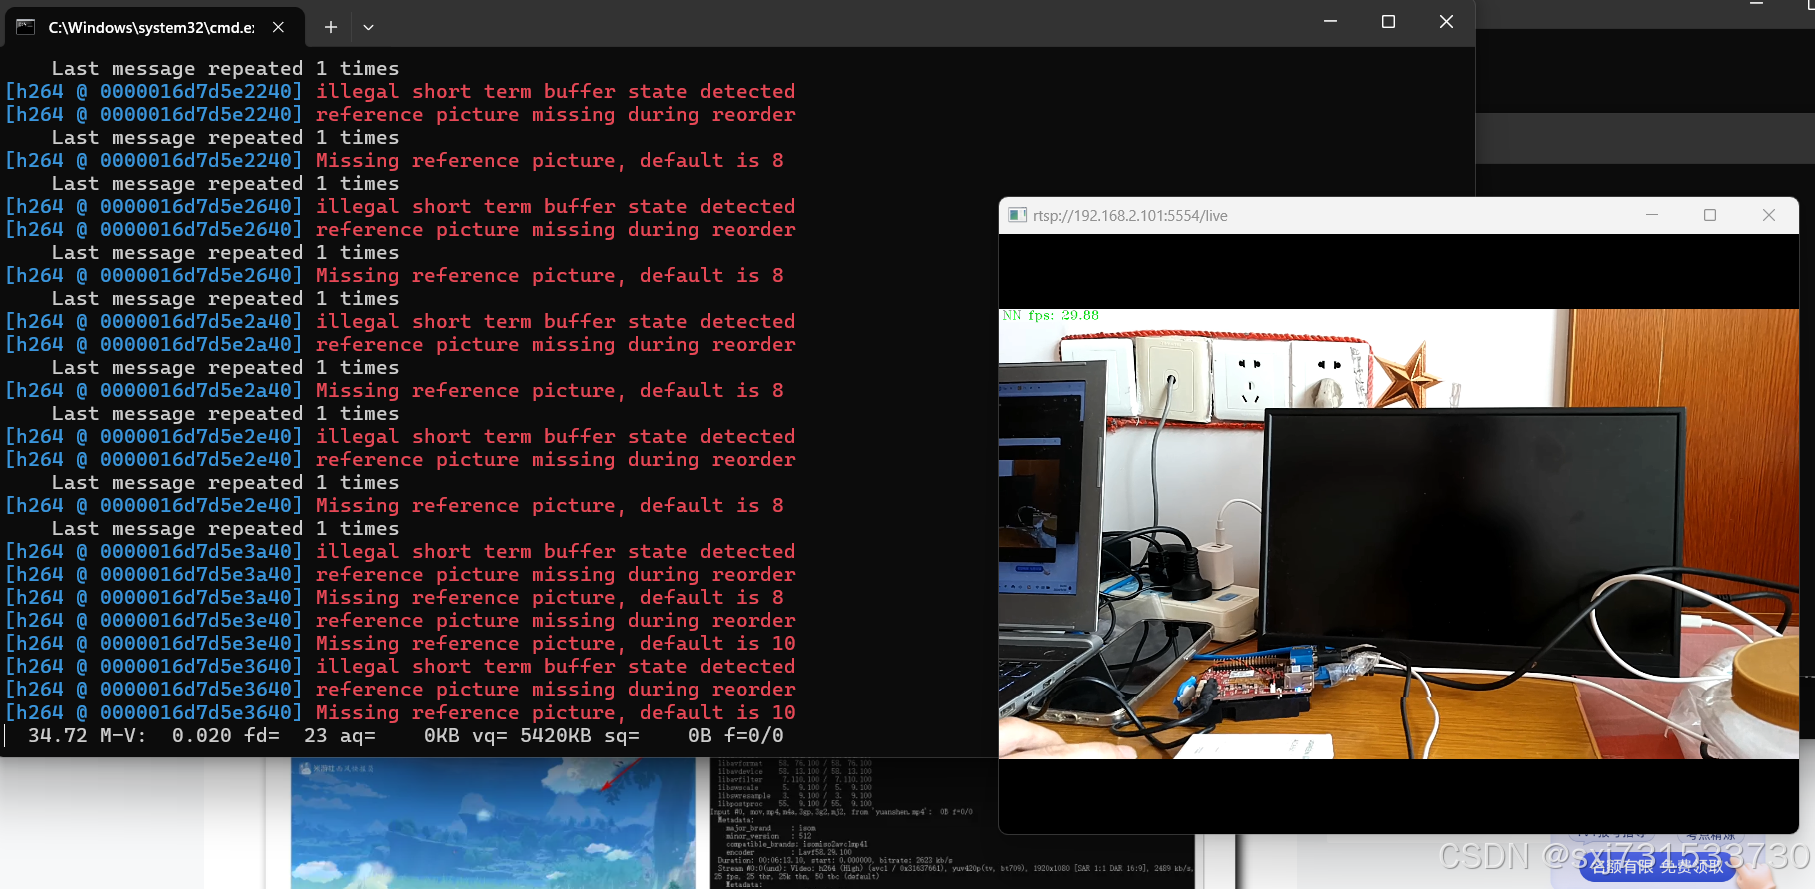
3) 增加板子使用openvnino推理+板子cpu/ffmpeg解码+推流;oak相机测距代码我就不添加了,实在没时间,太忙了
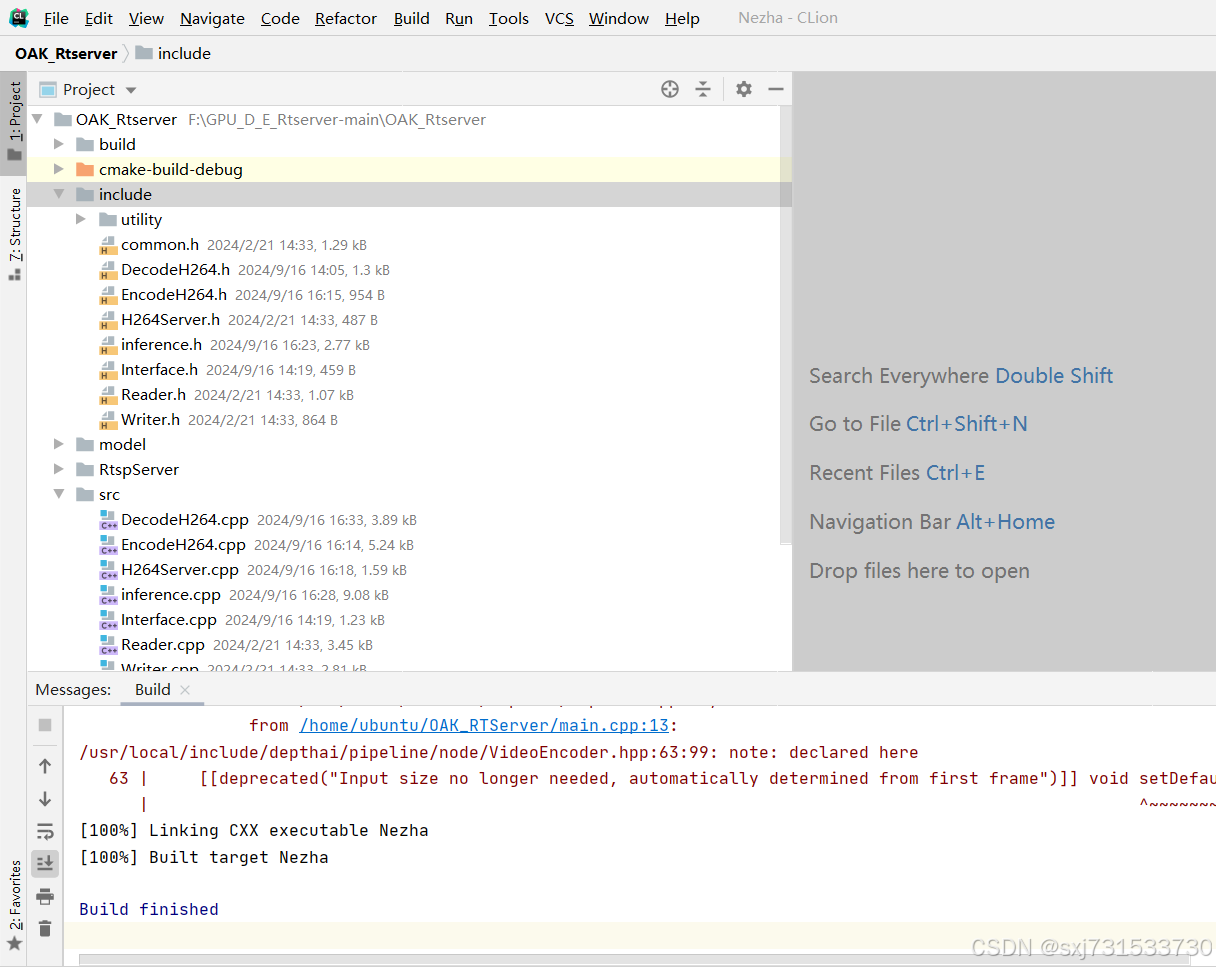
发现这个模型还是比较重,添加到推理端有点小卡,先不加了,先用cpu进行编解码推流吧,测试目录和github地址如下,效果图如下
拉流设置命令
github:https://github.com/sxj731533730/OAK_Rtserver.git
参考:
OAK相机如何将yoloV5lite模型转换成blob格式?_oak china yolov5模型转换-CSDN博客

