OpenVINO文本检测与识别
 小o
更新于 5年前
小o
更新于 5年前
模型解释
OpenVINO支持场景文字检测是基于MobileNet的PixelLink模型,该模型有两个输出,分别是分割输出与bounding Boxes输出,结构如下: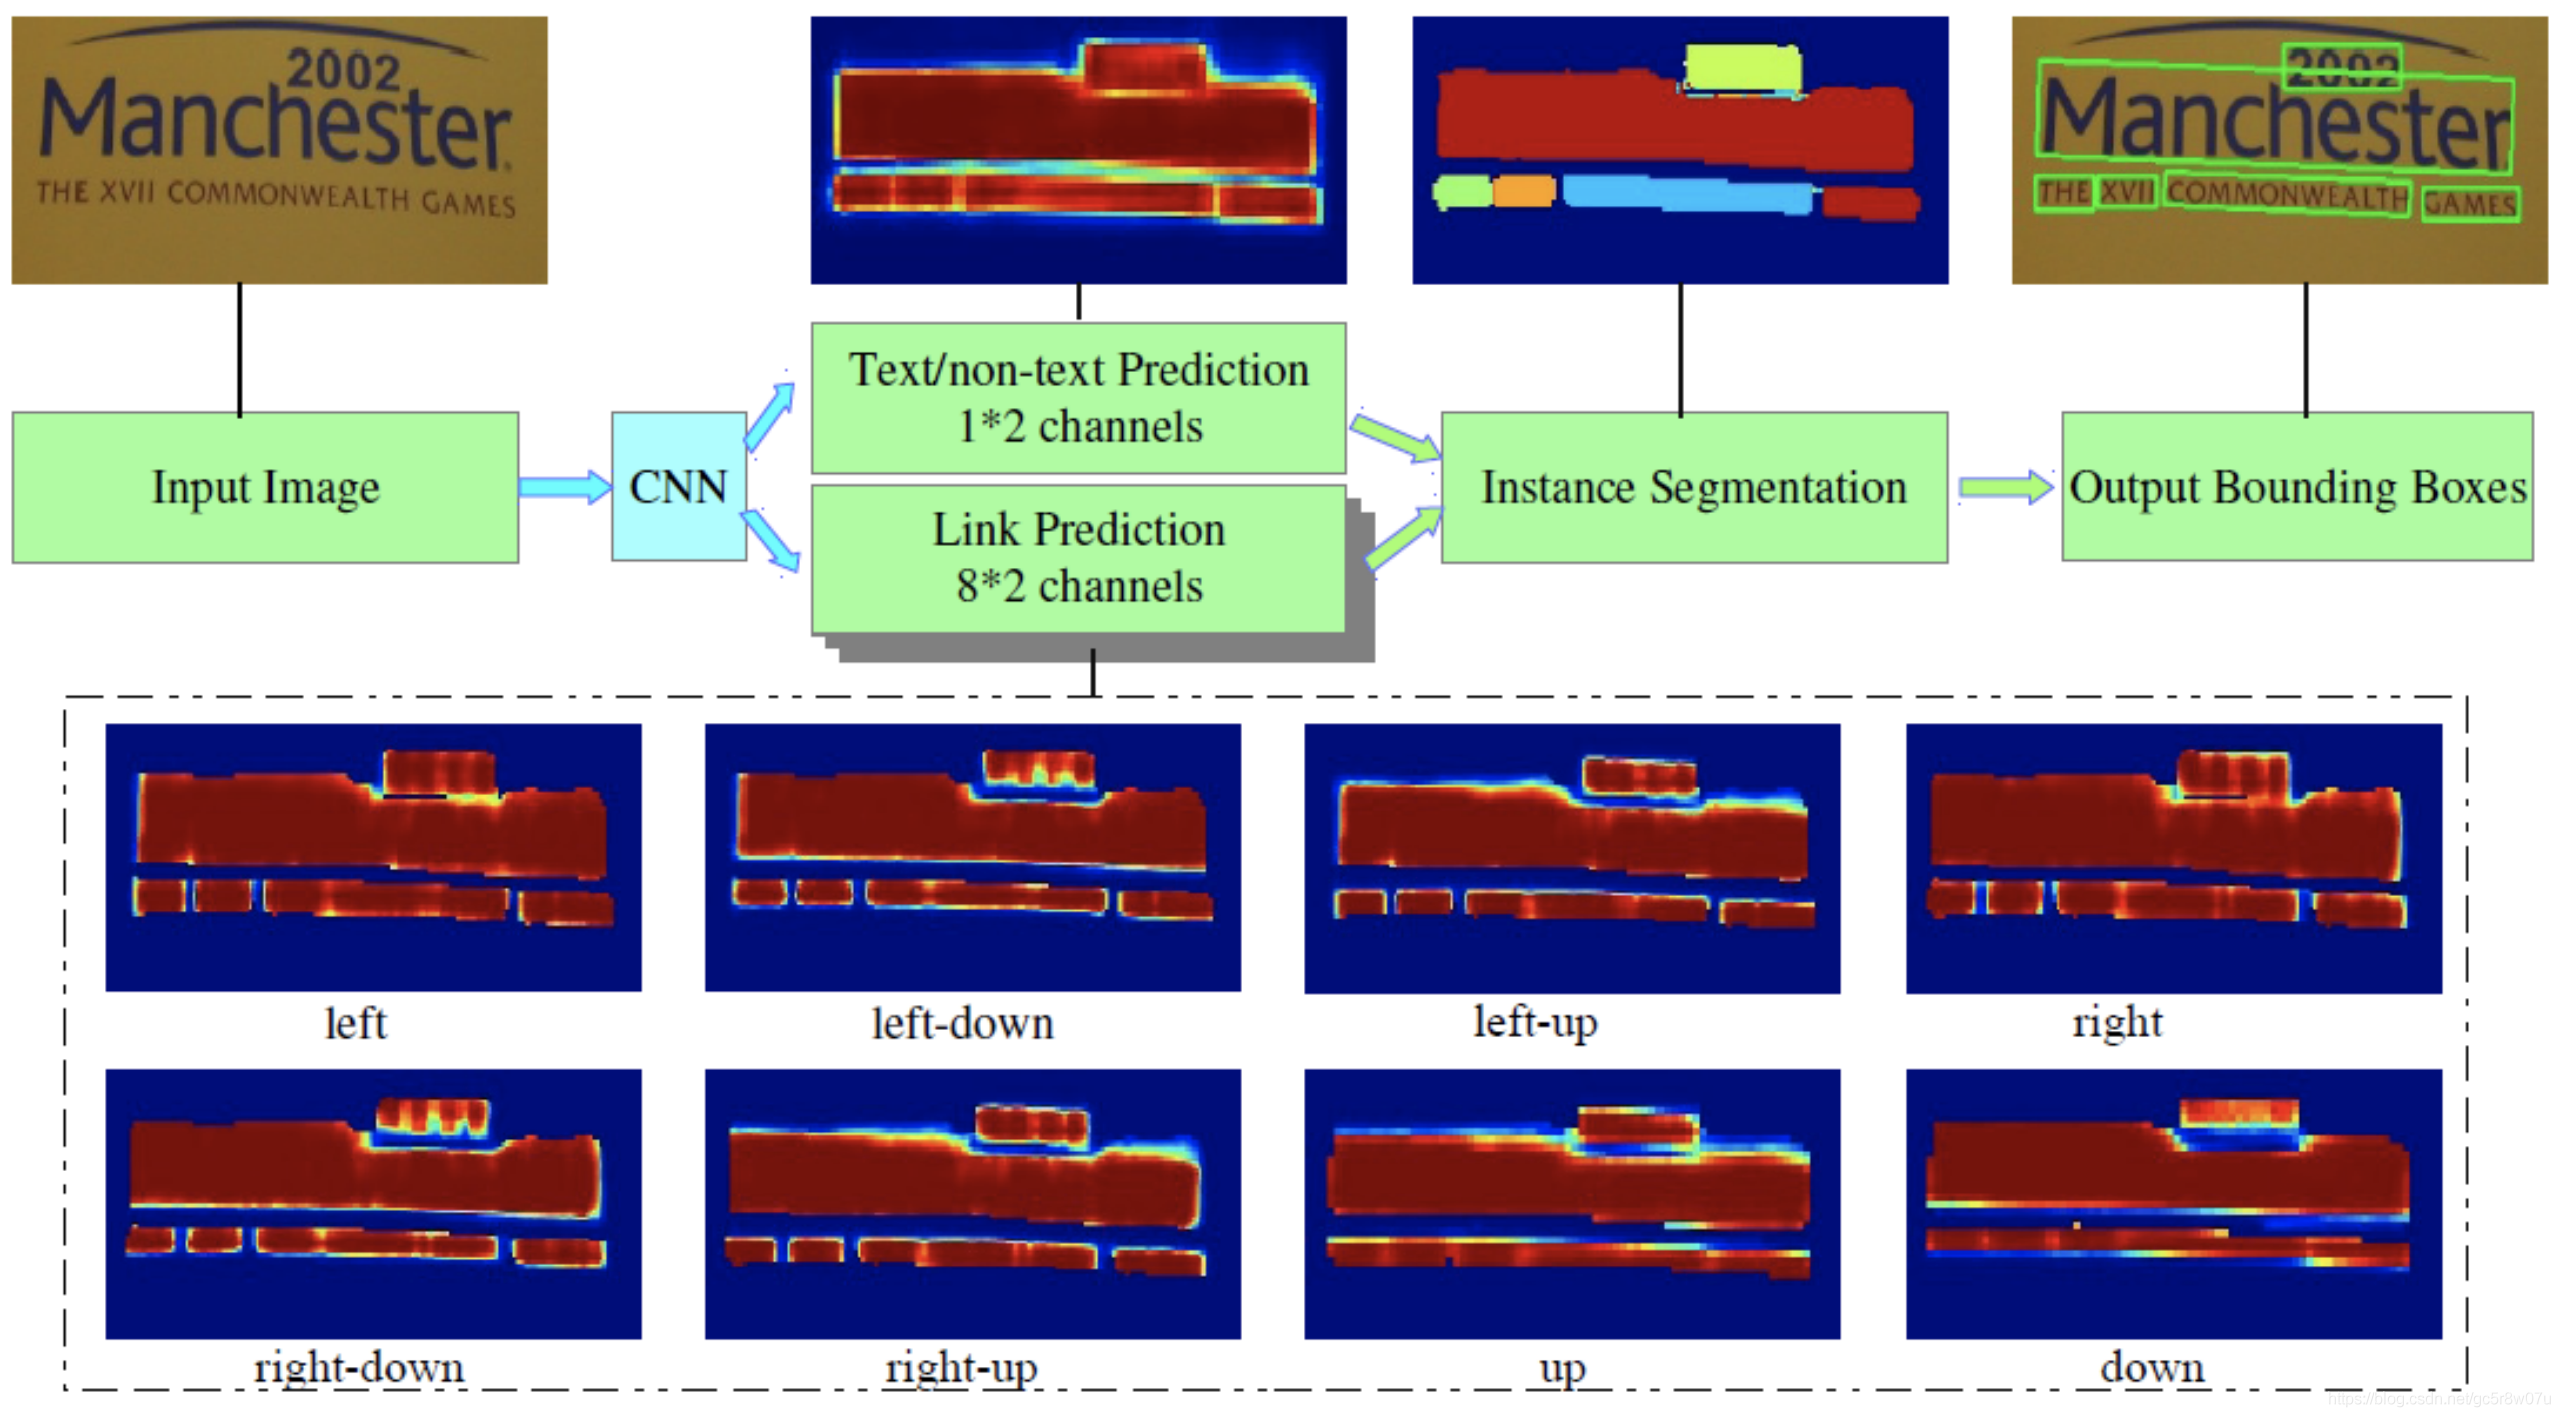
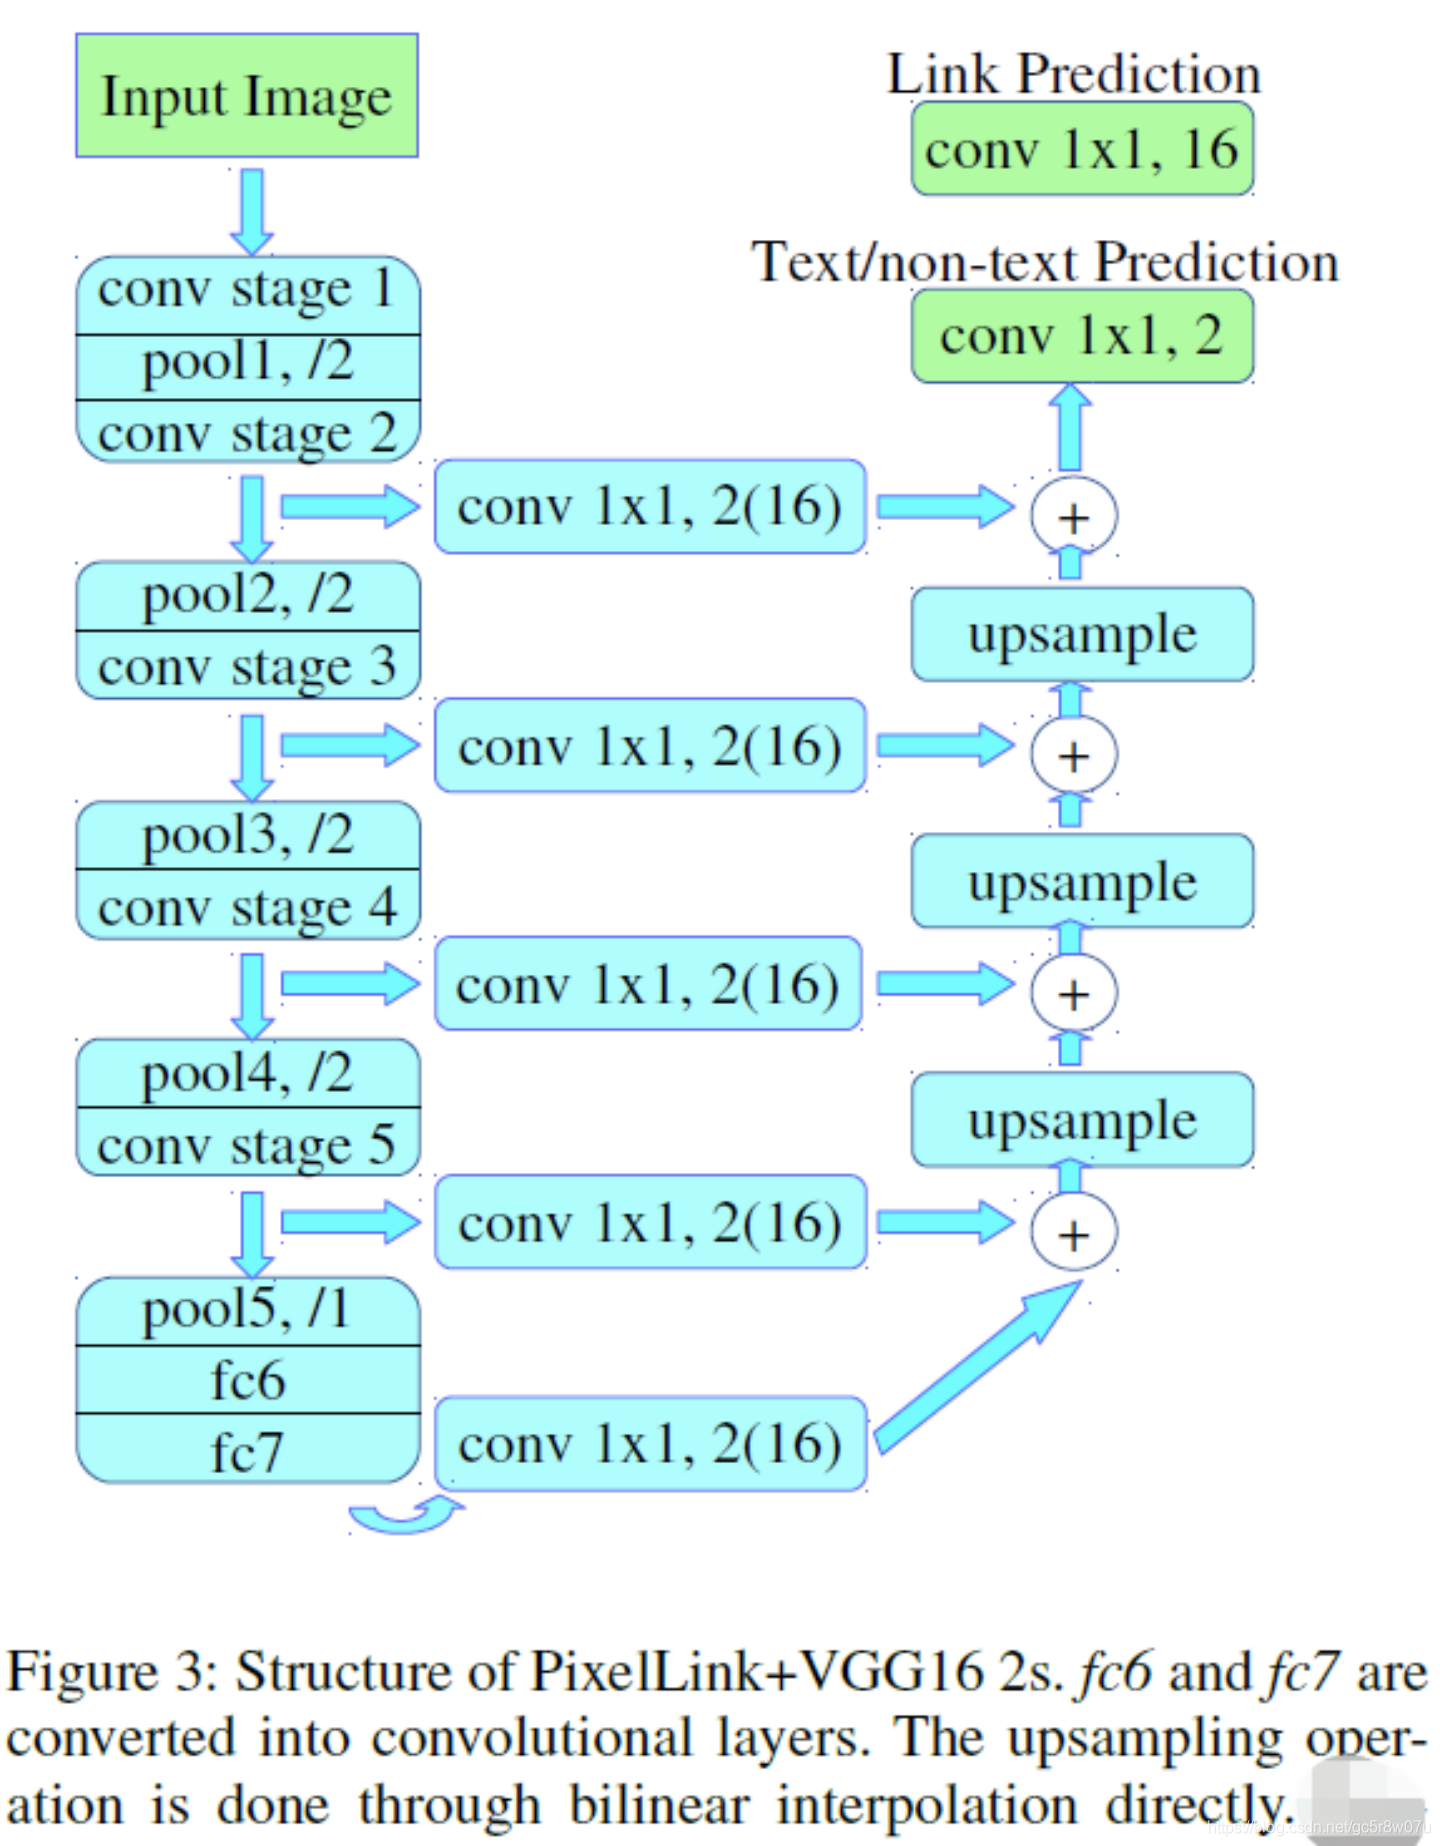
下面是基于VGG16作为backbone实现的PixelLink的模型结构:
输入格式:1x3x768x1280 BGR彩色图像
输出格式:
name: “model/link_logits_/add”, [1x16x192x320] – pixelLink的输出
name: “model/segm_logits/add”, [1x2x192x320] – 像素分类text/no text
文本识别
基于VGG16+双向LSTM,识别0~9与26个字符加空白,并且非大小写敏感!基于CNN+LSTM的文本识别网络结构如下: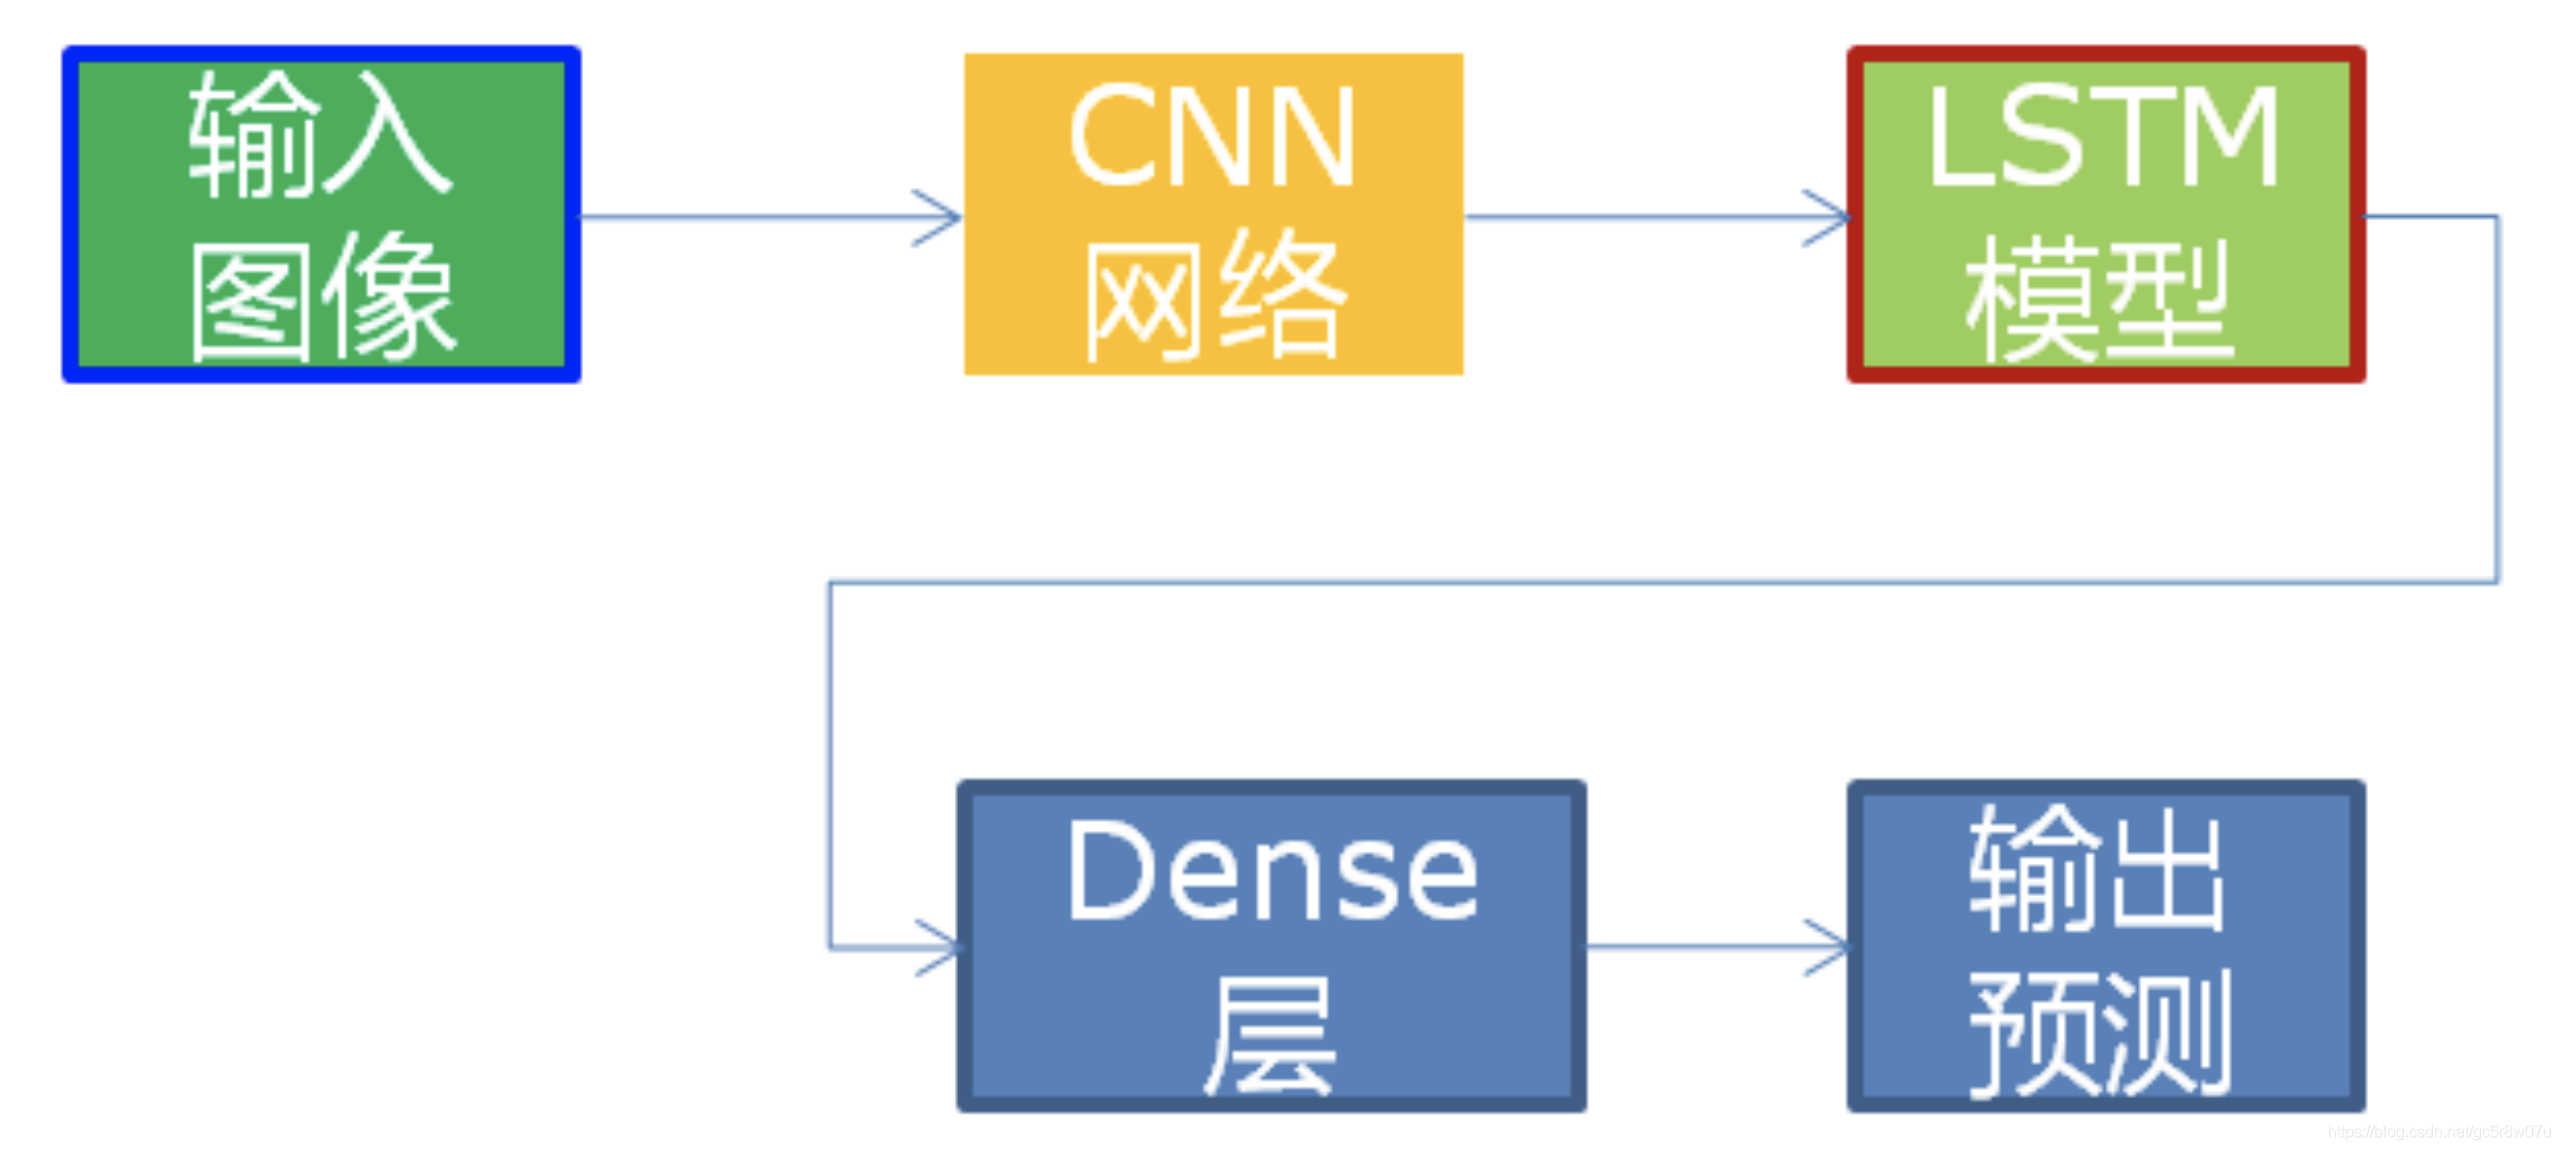
这里CNN使用类似VGG16结构提前特征,序列预测使用双向LSTM网络。
输入格式:1x1x32x120
输出格式:30, 1, 37
输出解释是基于CTC贪心解析方式。
文本检测
基于PixelLink完成文本检测,其中加载模型与获取输入与输出层名称的代码实现如下:log.info("Creating Inference Engine")
ie = IECore()
dete_net = ie.read_network(model=dete_text_xml, weights=dete_text_bin)
reco_net = ie.read_network(model=reco_text_xml, weights=reco_text_bin)
# 文本检测网络, 输入与输出格式
log.info("加载文本检测网络,解析输入与输出格式...")
input_it = iter(dete_net.input_info)
input_det_blob = next(input_it)
print(input_det_blob)
output_it = iter(dete_net.output****r>out_det_blob1 = next(output_it)
out_det_blob2 = next(output_it)
# Read and pre-process input image***r>print(dete_net.input_info[input_det_blob].input_data.shape)
dn, dc, dh, dw = dete_net.input_info[input_det_blob].input_data.shape
# Loading model to the plugin
det_exec_net = ie.load_network(network=dete_net, device_name="CPU")
print("out_det_blob1: ", out_det_blob1, "out_det_blob2: ", out_det_blob2)
执行推理与解析输出的代码如下:
image = cv.imread("D:/images/openvino_ocr.jpg")
# image = cv.imread("D:/facedb/tiaoma/1.png")
h, w, c = image.shape
cv.imshow("input", image)
img_blob = cv.resize(image, (dw, dh))
img_blob = img_blob.transpose(2, 0, 1)
# Start sync inference
log.info("Starting inference in synchronou***ode")
inf_start1 = time.time()
res = det_exec_net.infer(inputs={input_det_blob: [img_blob]})
inf_end1 = time.time() - inf_start1
print("inference time(ms) : %.3f" % (inf_end1 * 1000))
link_logits_ = res[out_det_blob1][0]
segm_logits = res[out_det_blob2][0]
link_logits_ = link_logits_.transpose(1, 2, 0)
segm_logits = segm_logits.transpose(1, 2, 0)
pixel_mask = np.zeros((192, 320), dtype=np.uint8)
print(link_logits_.shape, segm_logits.shape)
# 192, 320
for row in range(192):
for col in range(320):
pv1 = segm_logits[row, col, 0]
pv2 = segm_logits[row, col, 1]
if pv2 > 1.0:
pixel_mask[row, col] = 255
mask = cv.resize(pixel_mask, (w, h))
cv.imshow("mask", mask)
运行结果如下:
文本识别
文本识别跟文本检测的代码流程类似,首先需要加载模型,获取输入与输出层格式与属性,代码实现如下:ie = IECore()
reco_net = ie.read_network(model=reco_text_xml, weights=reco_text_bin)
# 文本识别网络
log.info("加载文本识别网络,解析输入与输出格式...")
input_rec_it = iter(reco_net.input_info)
input_rec_blob = next(input_rec_it)
print(input_rec_blob)
output_rec_it = iter(reco_net.output****r>out_rec_blob = next(output_rec_it)
# Read and pre-process input image***r>print(reco_net.input_info[input_rec_blob].input_data.shape)
rn, rc, rh, rw = reco_net.input_info[input_rec_blob].input_data.shape
# Loading model to the plugin
rec_exec_net = ie.load_network(network=reco_net, device_name="CPU")
print("out_rec_blob1: ", out_rec_blob)
# 文字识别
image = cv.imread("D:/images/zsxq/ocr3.png")
gray = cv.cvtColor(image, cv.COLOR_BGR2GRAY)
ret, binary = cv.threshold(gray, 0, 255, cv.THRESH_BINARY_INV | cv.THRESH_OTSU)
se = cv.getStructuringElement(cv.MORPH_RECT, (5, 1))
binary = cv.dilate(binary, se)
cv.imshow("binary", binary)
cv.waitKey(0)
contours, hireachy = cv.findContour***inary, cv.RETR_EXTERNAL, cv.CHAIN_APPROX_SIMPLE)
for cnt in range(len(contours)):
x, y, iw, ih = cv.boundingRect(contours[cnt])
roi = gray[y:y + ih, x:x + iw]
rec_roi = cv.resize(roi, (rw, rh))
rec_roi_blob = np.expand_dims(rec_roi, 0)
# Start sync inference
log.info("Starting inference in synchronou***ode")
inf_start1 = time.time()
res = rec_exec_net.infer(inputs={input_rec_blob: [rec_roi_blob]})
inf_end1 = time.time() - inf_start1
print("inference time(ms) : %.3f" % (inf_end1 * 1000))
res = res[out_rec_blob]
txt = greedy_prase_text(re****r> cv.putText(image, txt, (x, y), cv.FONT_HERSHEY_PLAIN, 1.0, (0, 0, 255), 1, 8)
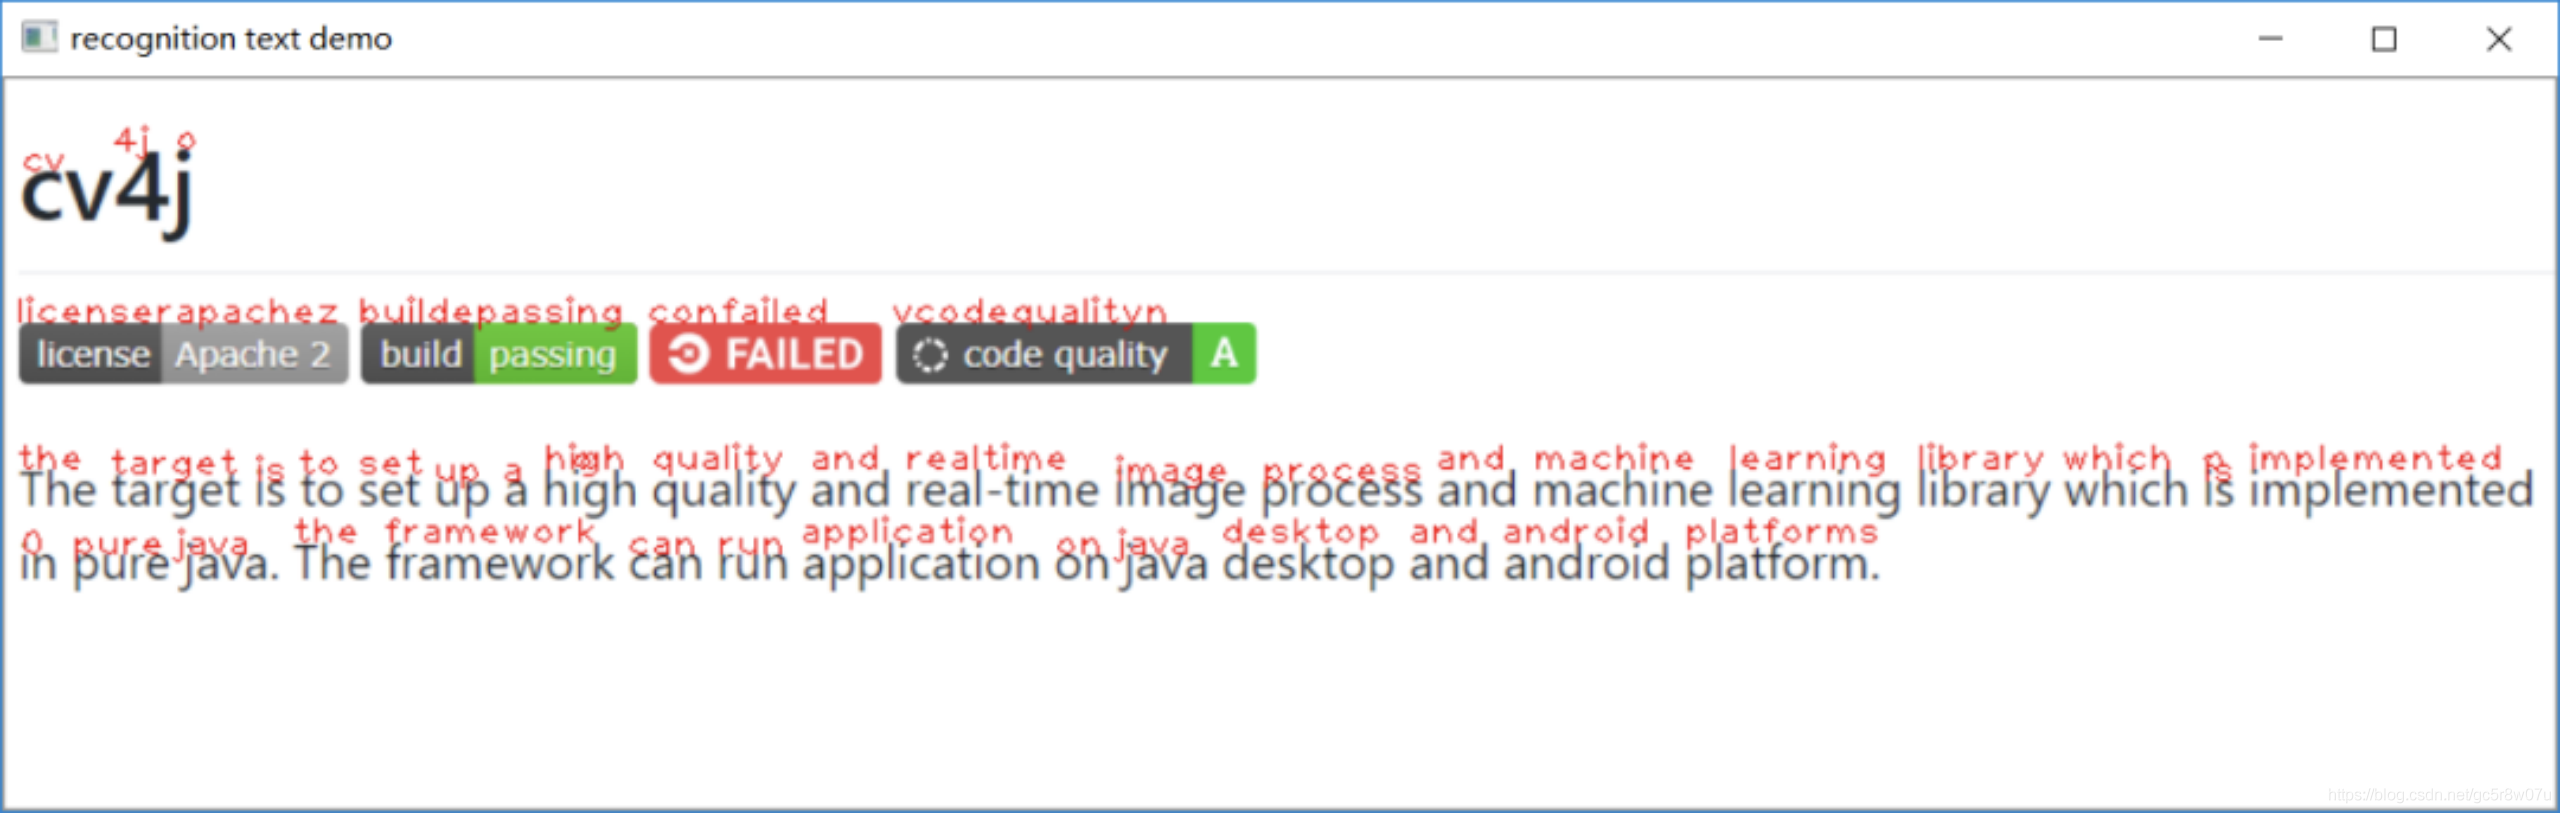
cv.imshow("recognition text demo", image)
cv.waitKey(0)
cv.destroyAllWindow******lockquote>
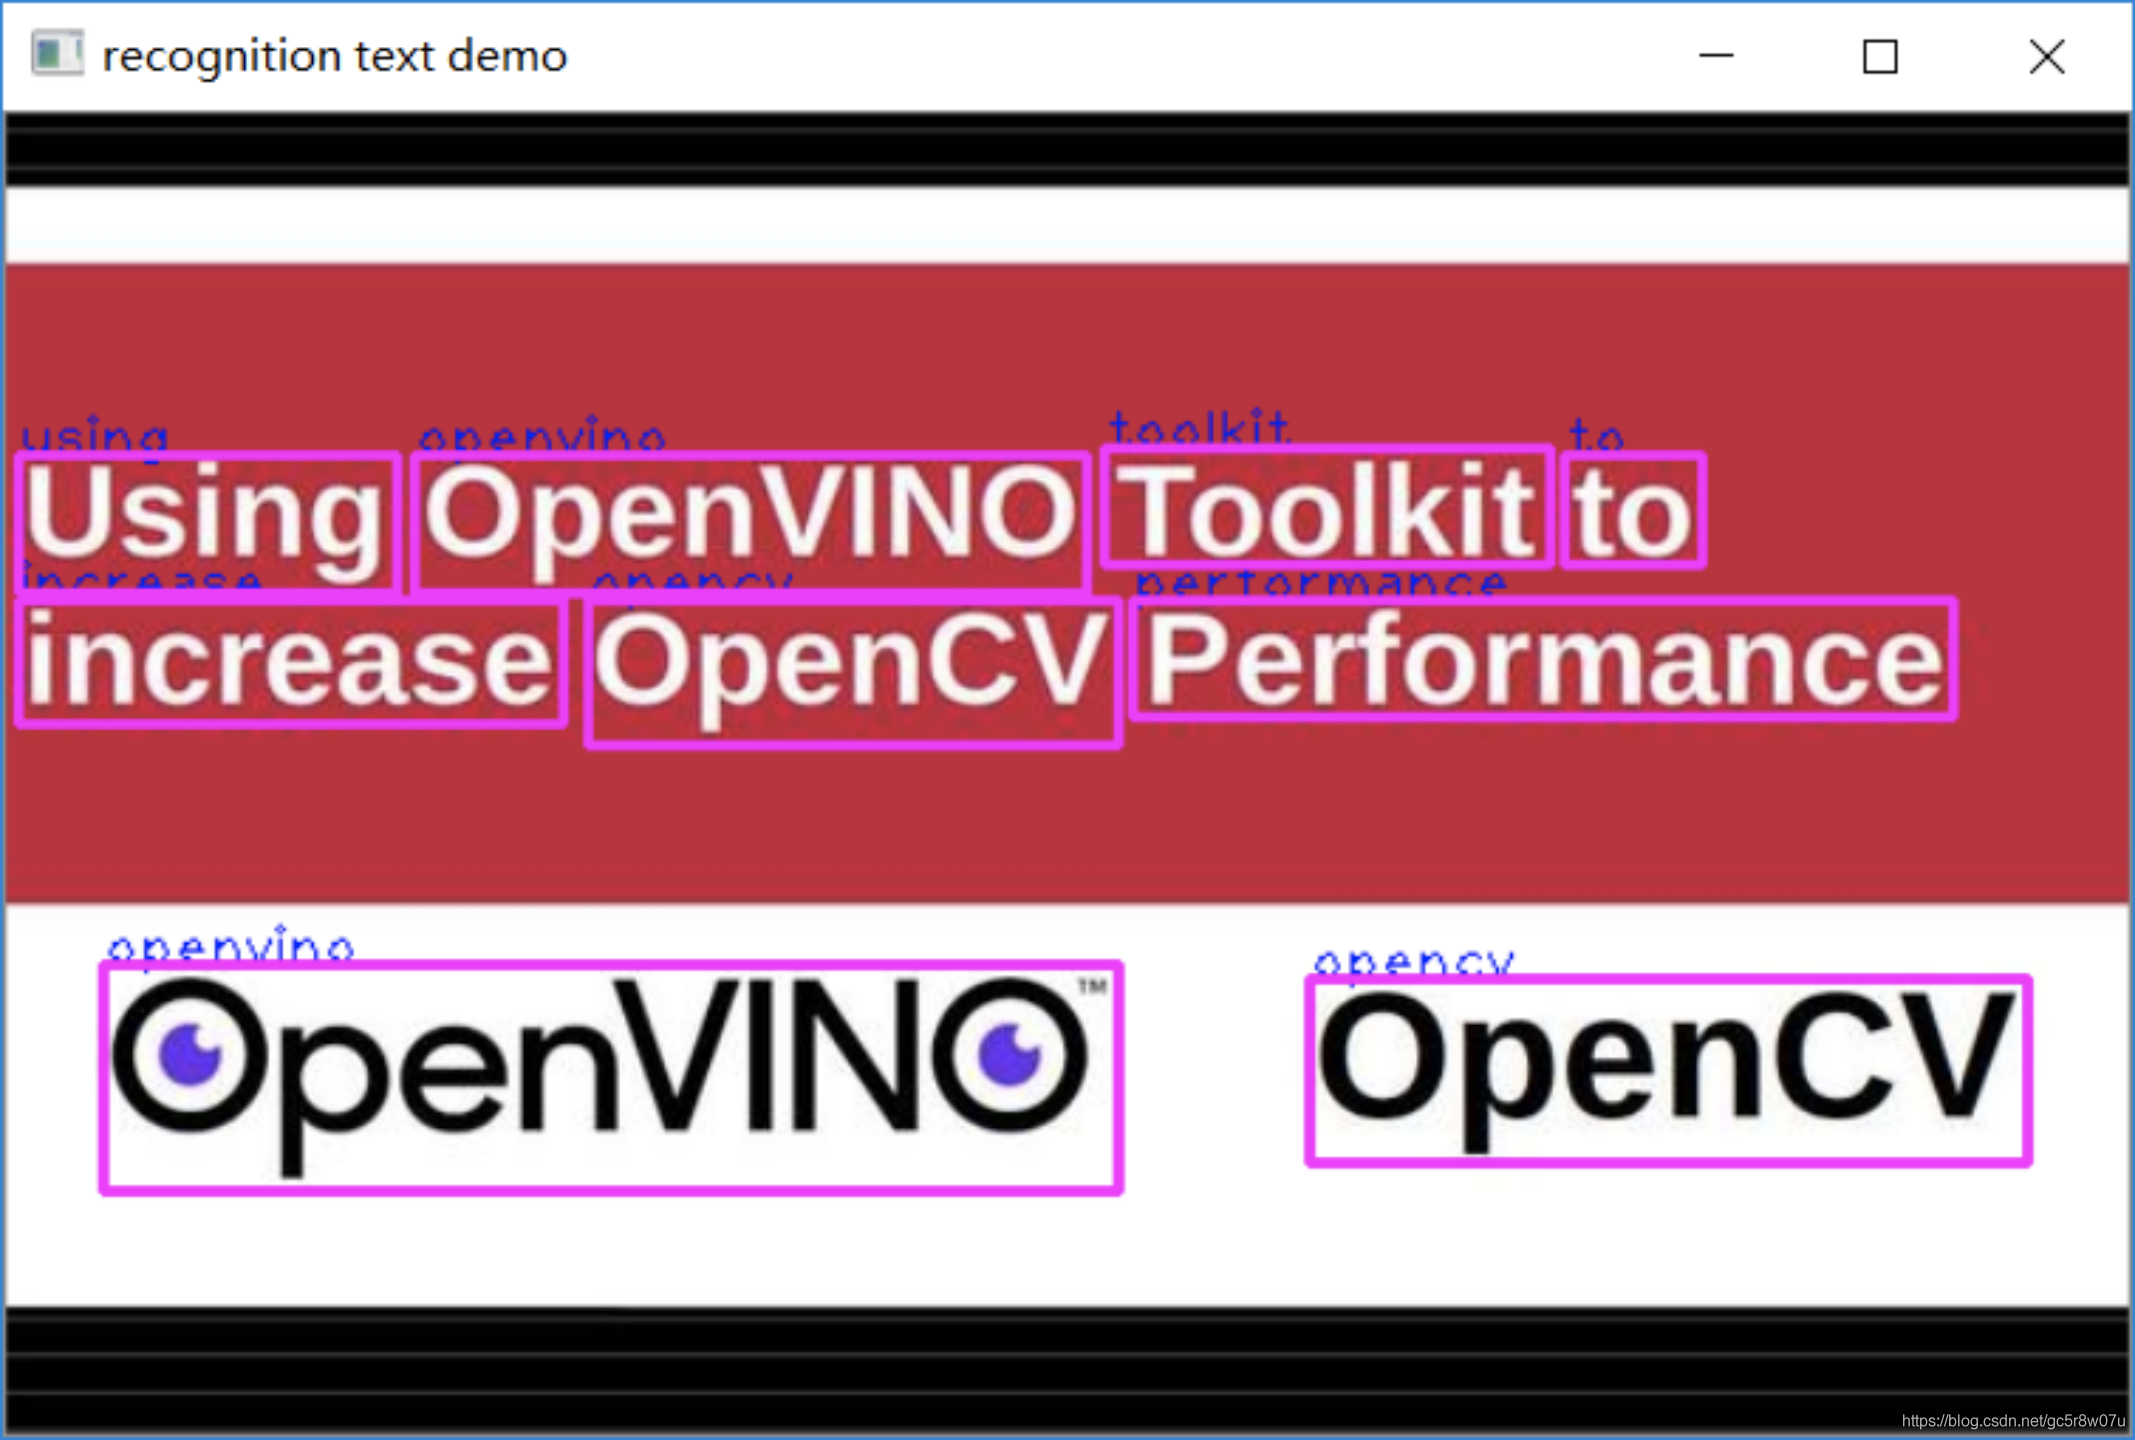
运行结果如下:
检测+识别 代码运行结果:

0个评论